
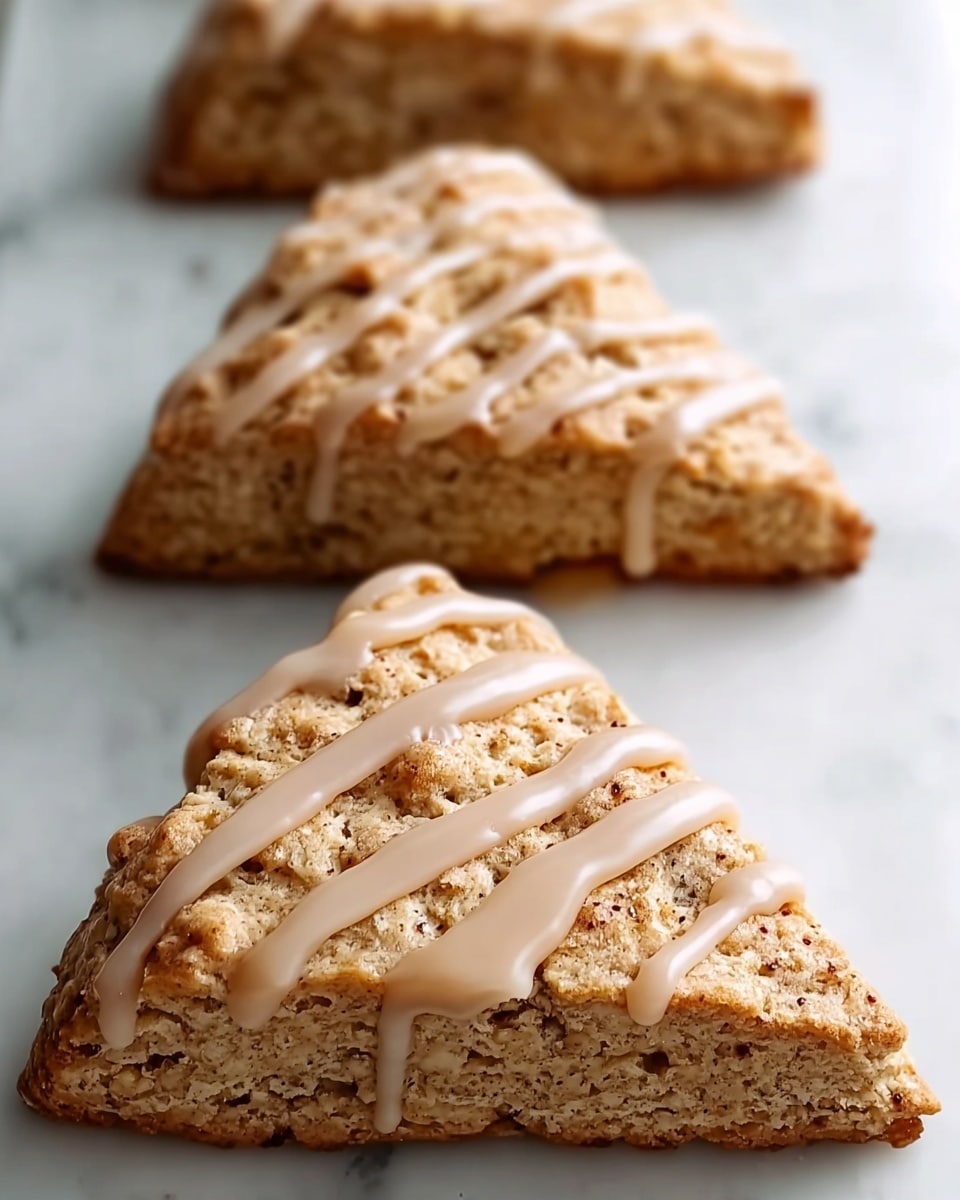
If you are craving a cozy treat that perfectly blends the comforting warmth of fall spices with a delightful flaky texture, look no further than this Pumpkin Snickerdoodle Scones Recipe. Imagine biting into tender, buttery scones infused with pumpkin puree, topped with a cinnamon-sugar crust, and finished with a subtle maple glaze that melts right into every bite. It’s a magical twist on classic snickerdoodles that will have you reaching for seconds (and maybe thirds) with a warm cup of coffee or tea. Whether you’re treating yourself on a crisp morning or impressing brunch guests, these scones are pure autumn bliss.

Ingredients You’ll Need
Gathering simple, pantry-friendly ingredients makes this Pumpkin Snickerdoodle Scones Recipe a breeze to whip up, yet each element plays an essential role. From the pumpkin puree that lends moistness and vibrant color, to the frozen butter that creates that irresistible flaky texture, every ingredient contributes to the perfect balance of flavor and structure.
- 2 cups (250 g) all-purpose flour: The base of our scones, providing structure and a tender crumb when measured correctly.
- 1/2 cup (113 g) unsalted butter, frozen: Grated into the flour to keep the dough flaky and light.
- 1/2 cup (100 g) light brown sugar: Adds just the right touch of sweetness and caramel notes that pair beautifully with pumpkin.
- 1/2 cup (120 g) canned pumpkin puree, blotted: Brings moistness, a subtle earthiness, and that signature pumpkin taste.
- 1/3 cup + 2 tablespoons (112 ml) heavy cream: Keeps the dough tender and helps with browning on top.
- 1 large egg, room temperature: Helps bind ingredients and adds richness.
- 1 teaspoon pure vanilla extract: Enhances sweetness and layers of flavor without overpowering.
- 2 1/2 teaspoons baking powder, fresh: The leavening agent that gives our scones a perfect rise.
- 1 teaspoon ground cinnamon: Infuses the batter with warm, spicy depth.
- 1 1/2 teaspoons pumpkin pie spice: A harmonious blend of nutmeg, cloves, and ginger creating that unmistakable fall aroma.
- 1/2 teaspoon salt: Balances sweetness and brightens flavors.
- Coarse sugar (optional, for topping): Adds a satisfying crunch and sparkle once baked.
How to Make Pumpkin Snickerdoodle Scones Recipe
Step 1: Prepare Your Oven and Baking Sheets
Preheat your oven to a toasty 400°F (204°C) so it’s ready to transform your scones into golden delights. Position the rack in the center for even baking, and line your baking sheets with parchment paper or lightly grease them. This small step ensures your scones come off easily without sticking or breaking.
Step 2: Mix Your Dry Ingredients
In a large bowl, whisk together the flour, baking powder, cinnamon, pumpkin pie spice, and salt. This ensures the leavening and spices are distributed evenly throughout the dough, so every bite bursts with balanced flavor.
Step 3: Incorporate the Frozen Butter
Using a box grater, grate the frozen butter directly into the flour mixture. These tiny butter pieces are the secret to flaky scones, as they create little pockets of steam while baking. Gently toss the grated butter with the dry ingredients just enough to coat the bits in flour, which helps them stay cold and distinct.
Step 4: Combine Wet Ingredients
In a separate bowl, whisk together the pumpkin puree (make sure it’s well blotted to avoid sogginess), egg, heavy cream, and vanilla extract until fully blended with no lumps. This smooth mixture will add moisture and richness, complementing the spices perfectly.
Step 5: Bring Wet and Dry Ingredients Together
Pour the wet mixture into the dry ingredients and gently stir just until the dough holds together. Avoid overmixing at this stage to keep the scones tender, even if the dough looks slightly crumbly. If the dough feels too sticky, add flour one tablespoon at a time until it’s workable without being dry.
Step 6: Shape the Dough
Flour your work surface lightly and turn the dough out. Pat it into an 8-inch (20 cm) disc using your hands or a rolling pin for uniform thickness. A neat disc helps the scones bake evenly. If your dough feels too soft and starts to spread, pop it in the fridge for about 15 minutes to chill and firm up.
Step 7: Add the Finishing Touch
Brush the top of the dough with a bit of heavy cream to encourage a beautiful golden finish. Then sprinkle coarse sugar generously on top to add a sparkly, crunchy texture that contrasts delightfully with the tender crumb.
Step 8: Bake to Perfection
Place the dough disc on your prepared baking sheet and slide it into the preheated oven. Bake for 20 to 25 minutes until the scones are puffed, golden, and aromatic. For even browning, rotate the sheet halfway through baking. The smell alone is worth the wait!
Step 9: Prepare the Maple Glaze
While your scones bake, whisk together your favorite maple glaze ingredients (a simple drizzle of maple syrup mixed with a little powdered sugar and milk works beautifully). Making the glaze just before your scones finish baking keeps it fresh and luscious.
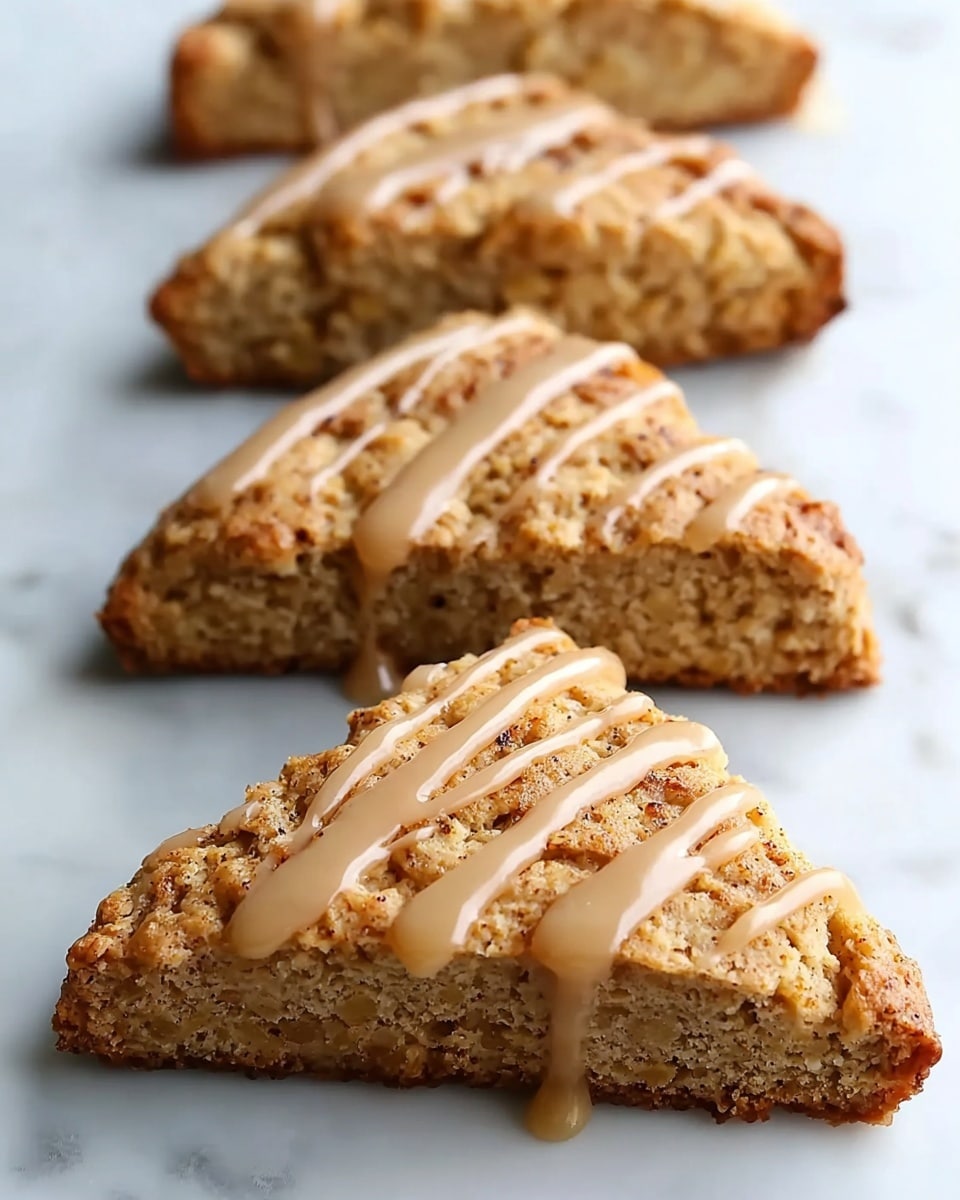
Step 10: Glaze and Serve Warm
Once out of the oven, while the scones are still warm, drizzle the maple glaze evenly over the tops. The glaze soaks in slightly, adding a sweet, silky finish that complements the snickerdoodle spice perfectly.
How to Serve Pumpkin Snickerdoodle Scones Recipe
Garnishes
For an extra-special touch, sprinkle a little extra cinnamon sugar on top after glazing or add chopped toasted pecans or walnuts for crunch. A light dusting of powdered sugar also looks lovely and adds a hint of sweetness without overpowering the pumpkin flavors.
Side Dishes
These scones pair wonderfully with creamy mascarpone or whipped cream cheese for a luscious spread. Serve alongside warm apple cider or your favorite chai tea to enhance that autumnal vibe. Fresh fruit — like crisp apples or juicy pears — provides a refreshing balance to the sweet spices.
Creative Ways to Present
Arrange the scones on a rustic wooden board lined with autumn leaves or a cozy plaid napkin for a festive seasonal display. Drizzle extra maple glaze in a tiny dish on the side for dipping. You can also slice the scones horizontally and turn them into fall-inspired mini sandwiches filled with cinnamon butter or cream cheese frosting.
Make Ahead and Storage
Storing Leftovers
Store leftover Pumpkin Snickerdoodle Scones in an airtight container at room temperature for up to 2 days to maintain their tenderness. If needed, keeping them in the fridge will extend freshness for up to 4 days but may slightly dry them out—reheating gently helps bring back soft warmth.
Freezing
You can freeze these scones either before or after baking. For unbaked dough, wrap the disc tightly in plastic and freeze for up to 1 month; just thaw and bake fresh when ready. Baked scones freeze beautifully too—place cooled scones in a freezer-safe bag and keep for up to 3 months.
Reheating
To revive the scones’ fresh-baked texture, warm them in a preheated oven at 350°F (175°C) for about 10 minutes. Avoid microwaving if possible to retain flakiness. If frozen, let them thaw at room temperature before reheating to ensure even warmth and a tender crumb.
FAQs
Can I use fresh pumpkin instead of canned for this Pumpkin Snickerdoodle Scones Recipe?
Absolutely! Just make sure to roast and puree your fresh pumpkin well, then blot any excess moisture with paper towels. Because fresh pumpkin can be wetter than canned, removing that moisture is key to maintaining the right dough consistency.
Is it okay to substitute butter with a dairy-free alternative?
Yes, you can substitute with a firm, cold dairy-free butter or margarine to keep the scones flaky. Keep the butter chilled and grated as usual for the best texture. Just be aware flavors may vary slightly depending on the substitute.
How can I make these scones sweeter or less sweet?
Adjust the light brown sugar in the recipe to your taste. You can increase it slightly for a sweeter treat or reduce it a bit for milder sweetness. The maple glaze is where you can also tailor the sweetness level, so feel free to drizzle less or more depending on your preference.
What if my dough is too sticky or too dry?
If your dough feels too sticky, add flour one tablespoon at a time until it’s manageable but not stiff. If it’s too dry and crumbly, add a splash more heavy cream to bring it together. The goal is a dough that holds together gently without being tough.
Can I skip the maple glaze or replace it?
Definitely! The maple glaze is optional but highly recommended for that extra touch of sweet sophistication. If you prefer, a simple dusting of powdered sugar or a light drizzle of honey works well too and lets the snickerdoodle spices shine on their own.
Final Thoughts
You really can’t go wrong making this Pumpkin Snickerdoodle Scones Recipe part of your seasonal baking ritual. With its warm spices, tender crumb, and luscious glaze, it’s a guaranteed crowd-pleaser that feels special but is surprisingly easy to make. So go ahead, try it yourself—your kitchen and taste buds will thank you in the most delicious way!
Print
Pumpkin Snickerdoodle Scones Recipe
- Prep Time: 20 minutes
- Cook Time: 25 minutes
- Total Time: 45 minutes
- Yield: 8 scones
- Category: Breakfast, Snack, Baked Goods
- Method: Baking
- Cuisine: American
- Diet: Vegetarian
Description
These Pumpkin Snickerdoodle Scones combine the comforting flavors of classic snickerdoodles with seasonal pumpkin and warm spices. Flaky and tender with a crisp sugary topping, they’re perfect for a cozy fall breakfast or snack, finished with a luscious maple glaze for extra sweetness and moisture.
Ingredients
Dry Ingredients
- 2 cups (250 g) all-purpose flour, preferably unbleached
- 2 1/2 teaspoons baking powder, fresh
- 1 teaspoon ground cinnamon, high-quality
- 1 1/2 teaspoons pumpkin pie spice
- 1/2 teaspoon salt
- 1/2 cup (100 g) light brown sugar
- Coarse sugar (optional), for topping
Wet Ingredients
- 1/2 cup (120 g) canned pumpkin puree, blotted to remove excess moisture
- 1/3 cup + 2 tablespoons (112 ml total) heavy cream
- 1 large egg, room temperature
- 1 teaspoon pure vanilla extract
Fat
- 1/2 cup (113 g) unsalted butter, frozen
Instructions
- Preheat Oven and Prepare Pan: Set your oven to 400°F (204°C) and allow it to fully heat. Adjust the baking rack to the middle position and prepare baking sheets by lining them with parchment paper or lightly greasing to prevent sticking.
- Combine Dry Ingredients: In a large bowl, whisk together the all-purpose flour, baking powder, ground cinnamon, pumpkin pie spice, salt, and brown sugar to evenly distribute the leavening agents and spices throughout the mixture.
- Add Butter: Using a box grater, grate the frozen unsalted butter directly into the dry mixture. This method creates small butter pieces that help produce the flaky texture desired in scones. Gently mix the grated butter with the flour mixture to coat the butter pieces with flour.
- Mix Wet Ingredients: In a separate bowl, whisk together the blotted pumpkin puree, egg, heavy cream, and vanilla extract until fully combined and smooth, with no liquid pockets.
- Combine Wet and Dry Mixtures: Pour the wet ingredients into the dry mixture. Gently stir just until the dough comes together, being careful not to overmix to avoid toughness. It’s okay if the dough looks slightly crumbly. If the dough is too wet and sticky, add flour one tablespoon at a time, folding gently until it holds together without stickiness.
- Shape the Dough: Turn the dough onto a floured surface and pat or gently roll it into an 8-inch (20 cm) diameter disc. This shape helps the scones bake evenly and makes it easy to cut into wedges. If the dough feels too soft and spreads excessively, chill it in the refrigerator for 15 minutes before shaping.
- Add Topping: Brush the top of the dough disc with a little heavy cream to help it brown nicely in the oven and to help the sugar adhere. Sprinkle generously with coarse sugar for a sweet, crunchy topping that complements the tender crumb.
- Bake: Place the shaped dough on the prepared baking sheet and bake in the preheated oven for 20 to 25 minutes, or until the tops are lightly browned and golden. Rotate the baking sheet halfway through baking if the browning is uneven to ensure even cooking.
- Prepare Glaze: While the scones bake, prepare the maple glaze by whisking together the glaze ingredients (details not provided in the recipe). Make the glaze near the end of the baking process to keep it fresh and drizzly.
- Glaze and Serve: When the scones come out of the oven and are still warm, drizzle the maple glaze evenly over the tops. The warm scones will absorb the glaze, enhancing their flavor and moisture.
Notes
- Use frozen butter grated into the flour to ensure flaky scones.
- Blot pumpkin puree on paper towels to remove excess moisture for better dough consistency.
- Do not overmix the dough; a slightly crumbly texture is okay to maintain tenderness.
- If the dough is too soft to handle, chilling it helps make shaping easier.
- Coarse sugar adds a nice crunch and decorative finish but is optional.
- Prepare the maple glaze at the end of baking to keep it fresh and drizzle-ready.


