
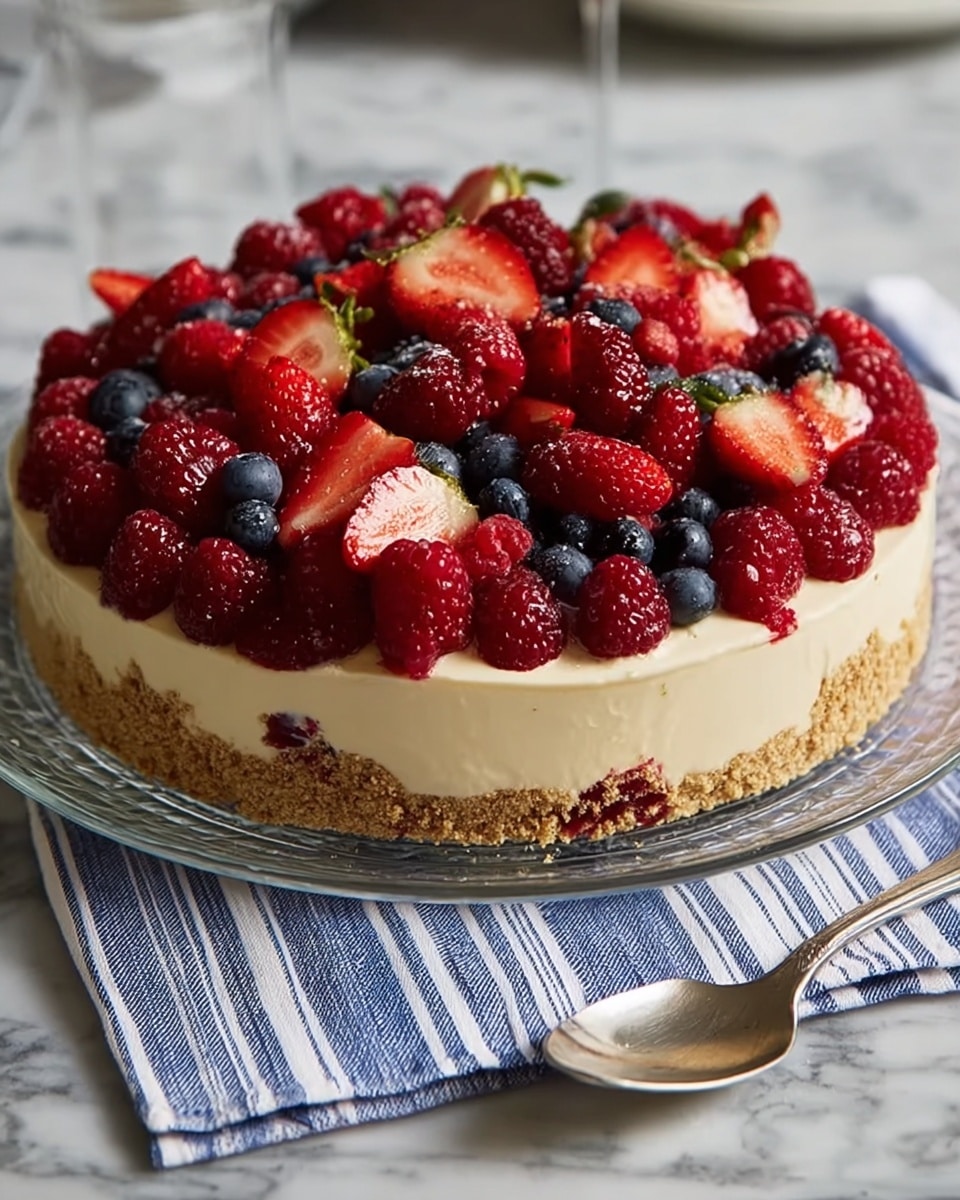
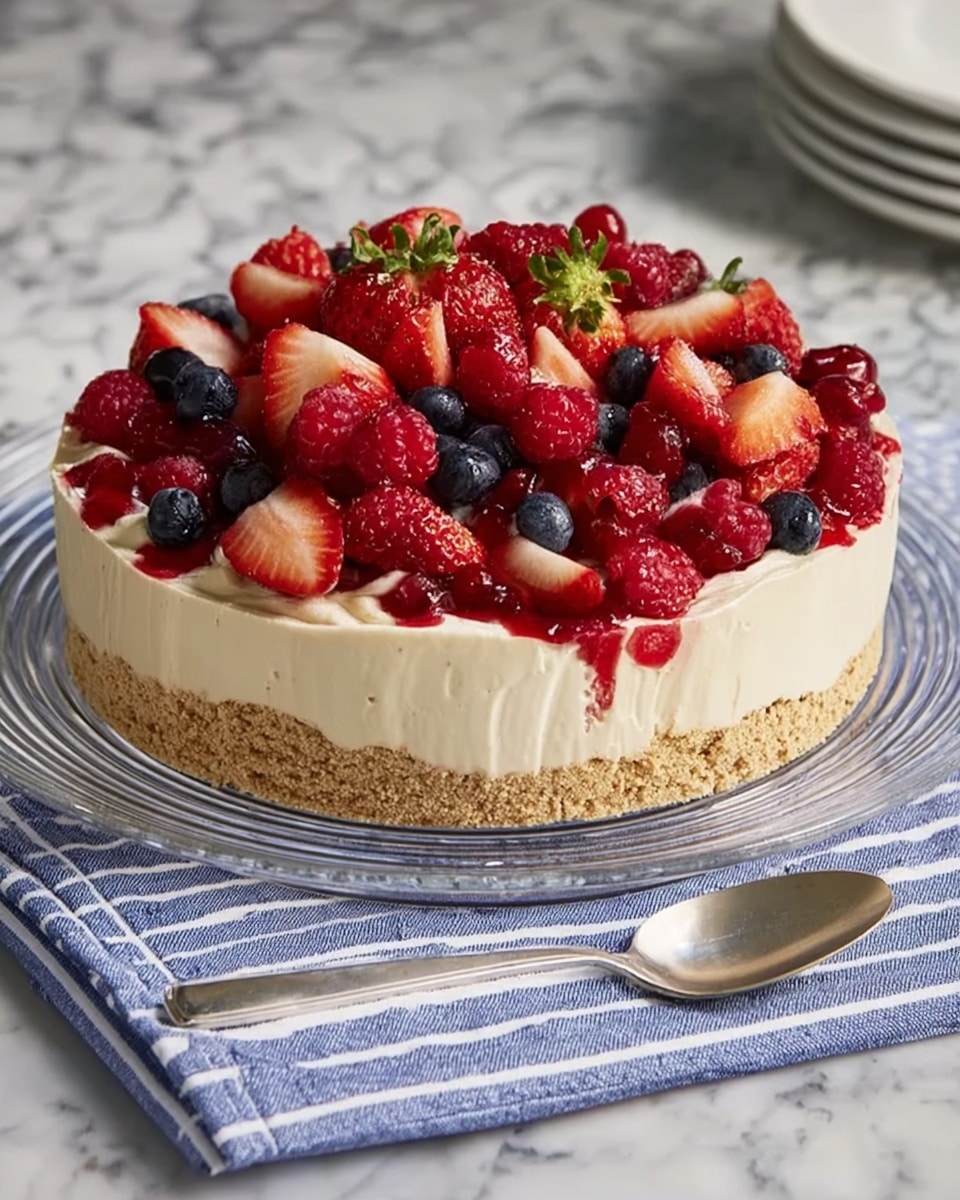
If you’re looking for a dessert that not only tastes heavenly but also dazzles your guests with its patriotic charm, this No-Bake Cheesecake Flag Cake Recipe is what you need. With its creamy, luscious filling resting on a perfectly crumbly chocolate-graham crust, and topped with vibrant fresh strawberries and blueberries arranged like a flag, it brings the perfect balance of flavor, texture, and visual wow. It’s an absolute showstopper that’s surprisingly easy to make, no oven required, making it ideal for summer gatherings, celebrations, or any time you want to impress with minimal fuss.

Ingredients You’ll Need
Getting started with this No-Bake Cheesecake Flag Cake Recipe is a breeze thanks to a handful of pantry staples and fresh berries. Each ingredient plays a key role, from creating a sturdy base to crafting a rich and fluffy filling, and finally, adding those bright pops of color that bring the flag design to life.
- Graham cracker crumbs (1 ½ cups): Provides the perfect crispy, buttery foundation for the crust.
- White sugar (¼ cup + ⅓ cup): Balances sweetness between crust and filling perfectly without overpowering.
- Unsweetened cocoa powder (2 tablespoons): Adds a subtle chocolate depth to the crust for extra richness.
- Butter, melted (6 tablespoons): Binds the crust crumbs together and delivers smooth texture.
- Cream cheese (1 cup): Gives the filling its classic tangy and creamy base.
- Mascarpone cheese (1 cup): Elevates the filling with extra silkiness and a delicate richness.
- Lemon zest (2 teaspoons): Brings fresh brightness that lifts all the creamy flavors.
- Lemon juice (2 teaspoons): Adds just the right touch of tang that balances sweetness beautifully.
- Vanilla extract (1 teaspoon): Boosts overall flavor complexity in the filling.
- Cold heavy whipping cream (1 ¼ cups): Whipped to soft peaks, it creates a light, fluffy texture that makes the cheesecake filling heavenly.
- Fresh strawberries (20 large): For crafting those vibrant red stripes that completely steal the show.
- Fresh blueberries (24 large): Forms the deep blue “stars” area, adding taste and color contrast.
How to Make No-Bake Cheesecake Flag Cake Recipe
Step 1: Prepare the Chocolate-Graham Crust
Start by combining your finely crushed graham cracker crumbs with sugar, cocoa powder, and melted butter in a bowl until everything is evenly mixed and crumbly. This base is key to supporting your creamy filling and adding just the right hint of chocolate to make the flavors pop.
Step 2: Form and Chill the Crust
Press the crumb mixture firmly into the bottom of a 9×11-inch baking dish, smoothing it out to create an even layer. Cover the dish with plastic wrap and pop it in the fridge for at least 30 minutes—this chilling step sets the crust so it stays crisp when the creamy filling is added.
Step 3: Mix Cream Cheese and Mascarpone
While the crust chills, blend the cream cheese and mascarpone together until perfectly smooth. Then stir in lemon zest, lemon juice, and vanilla extract to infuse the cheesecake with fresh, lively notes that brighten every bite.
Step 4: Whip the Cream and Combine
In a separate chilled bowl, whisk together the whipping cream and the smaller portion of sugar until soft peaks form. Gently fold the whipped cream into your cream cheese mixture—this step transforms the filling into a fluffy, airy delight that melts on your tongue.
Step 5: Assemble the Filling
Spoon this heavenly filling right over your chilled crust and smooth it with a spatula. Give the pan a few gentle taps on the counter to settle everything evenly. Cover tightly with plastic wrap again and refrigerate for at least 3 hours or until fully set. This pause is where the magic happens, as the filling firm ups while remaining beautifully creamy.
Step 6: Begin the Strawberry Stripes
Once chilled, it’s time to get creative and patriotic! Starting at the bottom long edge of the cake, neatly arrange halved strawberries in a horizontal line with the pointed ends facing right. Then create a shorter second stripe toward the top right corner, setting the stage for your flag design with precise, fresh red lines.
Step 7: Complete the Strawberry Stripes
Build three more full-length strawberry stripes with a small gap above the first stripe and one more just below the shorter stripe—the arrangement leaves a clean square in the upper left corner to represent the blue field of stars. This step is all about careful placement and putting your creative skills to work.
Step 8: Fill the Blueberry Star Field
Carefully fill in the remaining square corner with rows of blueberries facing with their blossom ends upwards, tightly packed to mimic the flag’s starry blue field. The cool blues against the vibrant reds and snowy white filling create a stunning visual contrast that is instantly festive and inviting.
Step 9: Serve Your Masterpiece
With your flag complete and chilled, slice the cake into squares for serving. Each bite brings a creamy, flaky, fruity experience that’s as delightful as it is beautiful. Get ready for lots of compliments—and maybe some patriotic smiles!
How to Serve No-Bake Cheesecake Flag Cake Recipe
Garnishes
A sprinkle of powdered sugar or a few fresh mint leaves around your flag can add a delicate touch of color and elegance, making the dessert feel thoughtfully finished and perfect for gatherings.
Side Dishes
This cheesecake pairs wonderfully with light sides like fresh fruit salads, lemon bars, or even a simple bowl of vanilla bean ice cream. These complement the richness without overwhelming that signature creamy texture.
Creative Ways to Present
Try serving the cake in individual mini dishes, or use cookie cutters to create star-shaped slices. You can also adorn your flag cake with edible glitter or tiny white chocolate stars to amp up the celebration vibe even further.
Make Ahead and Storage
Storing Leftovers
Cover any leftover cheesecake tightly with plastic wrap or transfer to an airtight container and store in the refrigerator. It will stay fresh and creamy for up to 3 days—perfect for enjoying later or sharing with friends.
Freezing
If you want to save some for later, wrap the cheesecake tightly in layers of plastic wrap and foil, then freeze for up to one month. Thaw overnight in the fridge before serving to keep its creamy texture intact.
Reheating
This dessert is best served chilled and is not suitable for reheating. Keeping it cool preserves the lusciousness and structure of the no-bake filling, ensuring every bite feels just right.
FAQs
Can I make this cheesecake gluten-free?
Absolutely! Simply swap out the graham cracker crumbs for a gluten-free alternative or crushed gluten-free cookies to keep the crust delightful without gluten.
What if I don’t have mascarpone cheese?
You can substitute mascarpone with an equal amount of cream cheese or ricotta cheese, but keep in mind mascarpone’s creaminess adds a unique richness worth seeking out.
How far in advance can I prepare the No-Bake Cheesecake Flag Cake Recipe?
This cake can be assembled up to one day ahead. Just make sure it stays refrigerated and fresh, and decorate with berries right before serving for maximum freshness.
Can I use frozen berries for decoration?
Fresh berries are best for this recipe since they hold their shape and color beautifully. Frozen berries tend to release moisture and can make the topping soggy.
Is the crust crunchy or soft after refrigeration?
The crust sets up firm and slightly crunchy thanks to the butter and cocoa, providing a satisfying contrast to the silky smooth filling.
Final Thoughts
There’s something truly special about the No-Bake Cheesecake Flag Cake Recipe—it’s a blend of festive creativity and delicious simplicity that anyone can enjoy making and sharing. Whether it’s for a holiday party or just a fun weekend dessert, this cheesecake is guaranteed to bring smiles and satisfied sighs. Give it a try and watch it become your new favorite go-to recipe for patriotic celebrations and beyond!
Print
No-Bake Cheesecake Flag Cake Recipe
- Prep Time: 30 minutes
- Cook Time: 0 minutes
- Total Time: 3 hours 30 minutes
- Yield: One 9×11-inch cheesecake (about 12 to 16 servings)
- Category: Dessert
- Method: No-Cook
- Cuisine: American
- Diet: Vegetarian
Description
This No-Bake Cheesecake Flag Cake is a festive and delicious dessert perfect for patriotic celebrations. It features a rich graham cracker and cocoa crust topped with a creamy lemon-infused mascarpone and cream cheese filling. The cake is decorated with fresh strawberries and blueberries arranged to resemble the American flag, creating a visually stunning and delightful treat that requires no baking.
Ingredients
Crust
- 1 ½ cups finely crushed graham cracker crumbs
- ¼ cup white sugar
- 2 tablespoons unsweetened cocoa powder
- 6 tablespoons butter, melted
Filling
- 1 cup cream cheese at room temperature
- 1 cup mascarpone cheese at room temperature
- 2 teaspoons grated lemon zest
- 2 teaspoons lemon juice
- 1 teaspoon vanilla extract
- ⅓ cup white sugar
- 1 ¼ cups cold heavy whipping cream
Decoration
- 20 large fresh strawberries, hulled and halved lengthwise, or as needed
- 24 large fresh blueberries, or as needed
Instructions
- Prepare the crust: Combine graham cracker crumbs, ¼ cup sugar, cocoa powder, and melted butter in a bowl until mixture is thoroughly combined and crumbly.
- Set the crust: Transfer crust mixture to a 9×11-inch baking dish. Press crust into bottom of dish until smooth and even. Cover dish with plastic wrap and refrigerate until set, about 30 minutes.
- Make the cheese filling: Mix cream cheese and mascarpone cheese in a bowl until thoroughly combined. Stir in lemon zest, lemon juice, and vanilla extract into the mixture.
- Whip the cream: Whisk ⅓ cup sugar into 1 ¼ cups cold heavy whipping cream in a separate metal or glass bowl until the cream is fluffy and forms soft peaks. Add whipped cream to the cream cheese mixture and gently whisk until filling is soft, fluffy, and well combined.
- Assemble the cake: Spoon filling on top of the graham cracker crust, spreading and smoothing the top. Tap the pan gently on a work surface several times to settle the crust and filling. Cover pan tightly with plastic wrap and refrigerate until chilled and set, at least 3 hours.
- Arrange the strawberries: Starting at the bottom long edge of the cake, arrange strawberry halves in a horizontal line with the pointed bottoms of the strawberry halves pointing to the right. Start a second stripe of strawberry halves at the top right of the cake, arranging strawberries with the bottoms pointing right in a line stretching about 2/3 of the length of the cake.
- Continue strawberry stripes: Make three more horizontal stripes of strawberries, starting about ¾ inch up from the bottom stripe and stretching the full length of the cake. Add one more short stripe below the second stripe to leave a square space for the blueberries.
- Add the blueberries: Fill the square space at the upper left of the cake with lines of blueberries, blossom ends pointing up, placing berries closely to each other to mimic the blue field of stars on the flag.
- Serve: Cut cake into squares and serve chilled.
Notes
- Use room temperature cream cheese and mascarpone for a smooth filling without lumps.
- Press crust firmly to ensure it holds well after chilling.
- Chilling time is crucial for the cheesecake to set properly before decorating.
- Fresh strawberries and blueberries should be ripe and firm for an attractive presentation.
- Keep the cake refrigerated until serving to maintain texture and freshness.


