
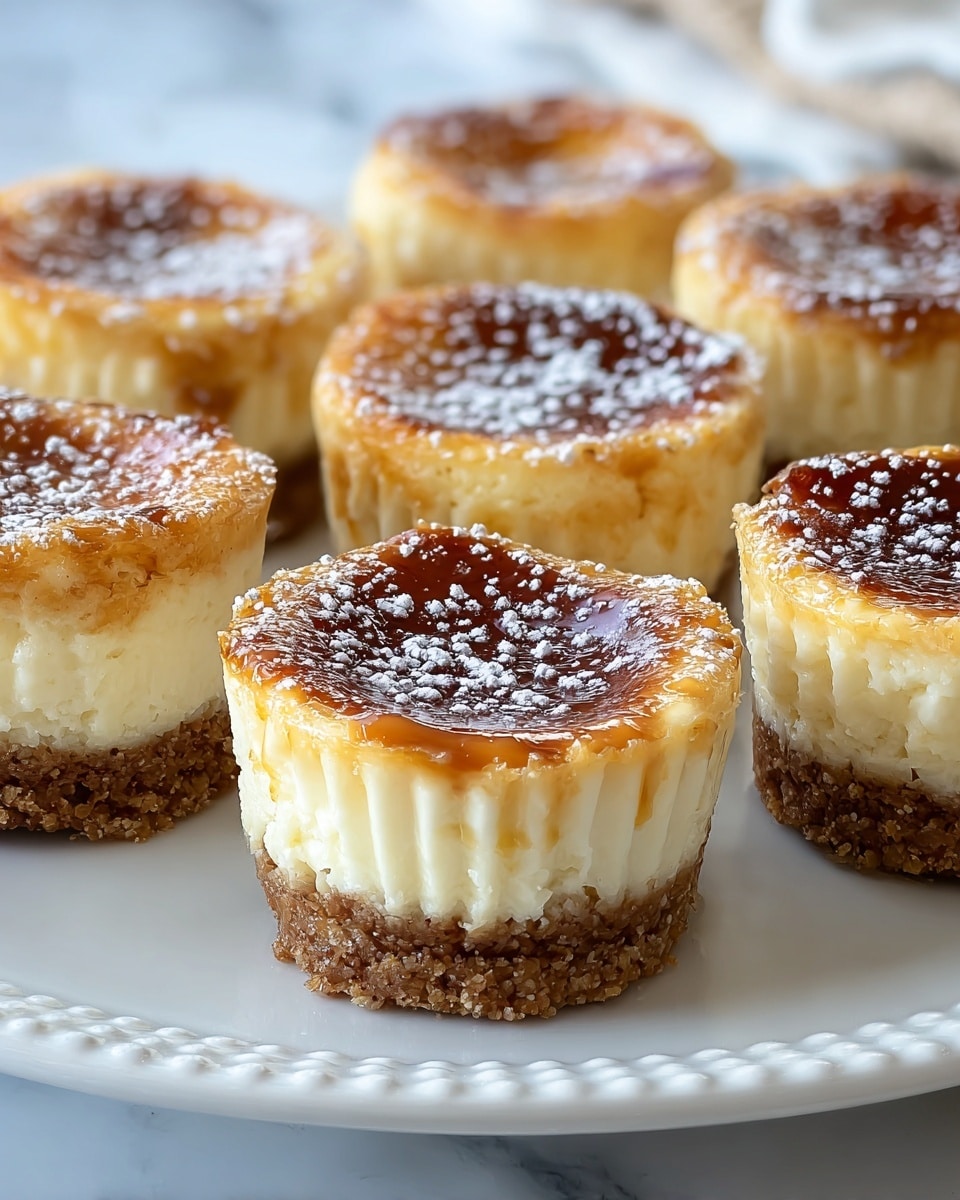
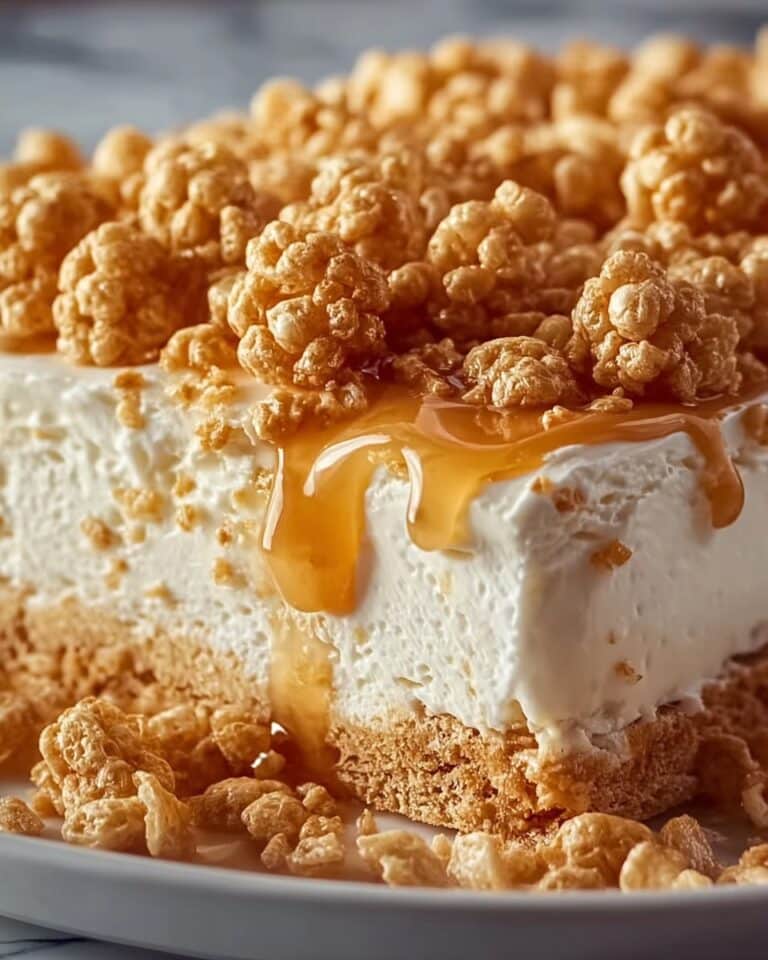
If you’re looking for a divine treat that combines the rich creaminess of cheesecake with the luxuriously caramelized top of a classic crème brûlée, look no further than this Mini Crème Brûlée Cheesecakes Recipe. These adorable, bite-sized delights bring together smooth, velvety cheesecake nestled on a crisp graham cracker crust, all crowned with a perfectly torch-browned sugar shell. They’re the ultimate crowd-pleaser — elegant enough for special occasions but easy enough for any day you want to feel fancy. Trust me, once you try this Mini Crème Brûlée Cheesecakes Recipe, it’ll become a go-to in your dessert rotation!

Ingredients You’ll Need
The magic behind these mini cheesecakes lies in simple, wholesome ingredients that fuse together to deliver both texture and flavor. Every component plays a crucial role, from the buttery graham cracker crust that gives a satisfying crunch, to the lush cream cheese and sour cream filling providing that creamy bite, and finally, the sweet, caramelized sugar topping sealing the deal.
- 1 cup graham cracker crumbs: The base that adds wonderfully crisp texture and a subtle honeyed flavor.
- 2 tablespoons granulated sugar: Balances sweetness in the crust to complement the filling perfectly.
- 1/4 cup melted butter: Holds the crust together with a rich, buttery undertone.
- 16 oz cream cheese, softened: The star ingredient delivering a silky, tangy cheesecake base.
- 1/2 cup granulated sugar: Sweetens the creamy filling without overpowering it.
- 2 large eggs: Bind the filling and help it set flawlessly while keeping it smooth.
- 1 teaspoon vanilla extract: Infuses depth and warmth into the cheesecake mixture.
- 1/4 cup sour cream: Adds slight tang and extra creaminess for a luxurious mouthfeel.
- 1/4 cup granulated sugar (for caramelized topping): Creates the signature brûlée crunch when torched.
How to Make Mini Crème Brûlée Cheesecakes Recipe
Step 1: Prepare the Crust
Start by heating your oven to 325°F (160°C) and lining a 12-cup muffin tin with paper liners to make cleanup a breeze. Mix those graham cracker crumbs with sugar and melted butter until the texture resembles moist sand. Press a spoonful firmly into each muffin cup, forming an even crust that will crisp up beautifully during baking.
Step 2: Whip Up the Cheesecake Filling
In a large bowl, beat the softened cream cheese and sugar until completely smooth and lump-free — this step is key to that smooth cheesecake texture. Add eggs one at a time, mixing thoroughly after each to ensure complete incorporation. Finally, stir in vanilla extract and sour cream, beating just enough to combine everything evenly while preserving that luscious creaminess.
Step 3: Bake and Chill
Divide the cheesecake filling evenly over your prepared crusts, filling each muffin cup nearly to the top. Bake for 18 to 20 minutes until the centers are set but still slightly jiggly — this guarantees a silky finish. Allow them to cool on a wire rack before transferring to the fridge to chill for at least two hours so the flavors meld perfectly and the texture firms up for that irresistible bite.
Step 4: Caramelize the Sugar Topping
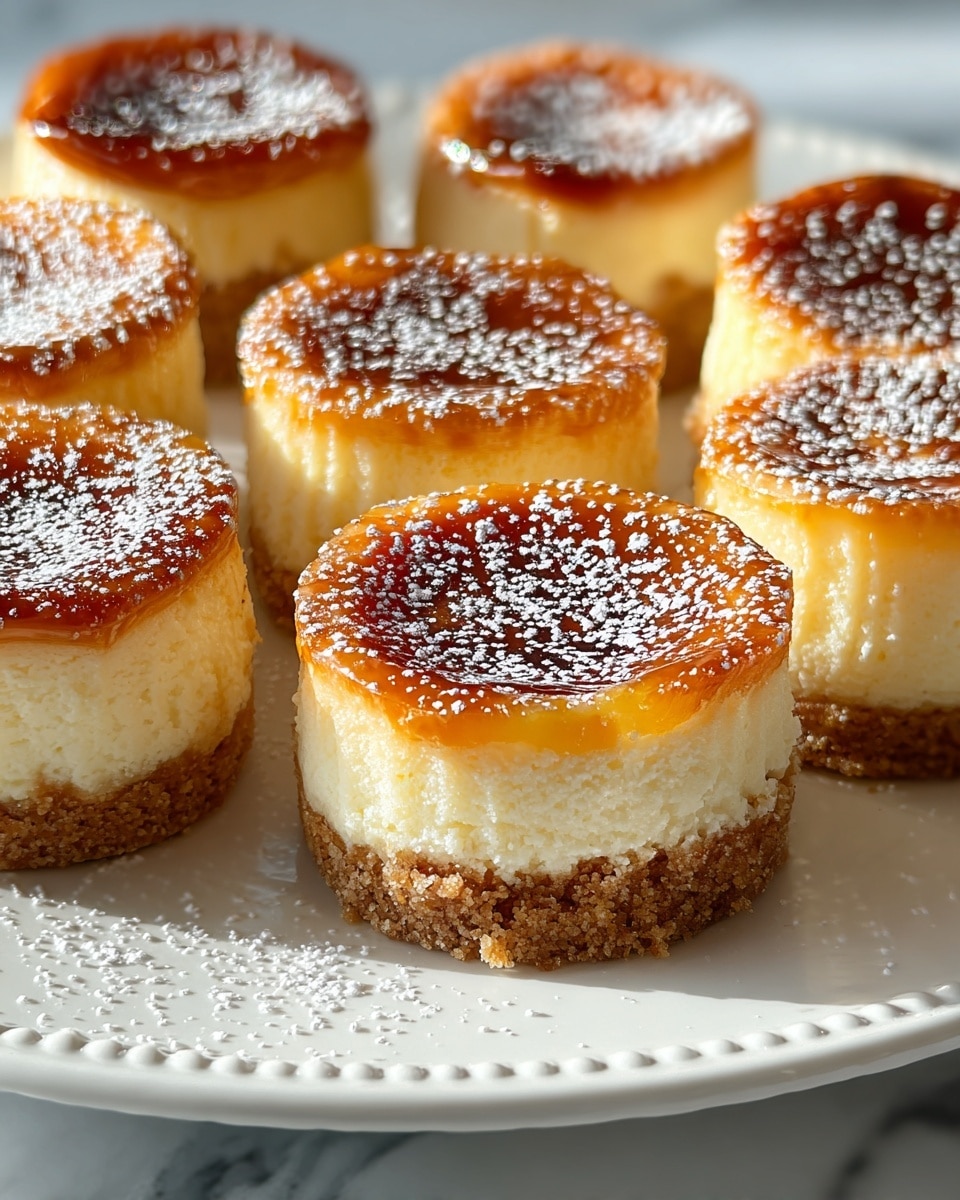
Right before serving, sprinkle a teaspoon of granulated sugar over each cheesecake. Use a kitchen torch (or broiler if you don’t have one) to caramelize the sugar, creating that signature crisp, golden crust that cracks delightfully with every bite. Let the caramelized sugar cool and harden briefly — then you’re ready to indulge!
How to Serve Mini Crème Brûlée Cheesecakes Recipe
Garnishes
For a pop of color and extra flavor contrast, fresh berries like raspberries or blueberries are perfect — their tartness balances the sweetness beautifully. A tiny mint leaf on top adds an elegant touch and a subtle herbal note that wakes up the palate.
Side Dishes
Pair these bite-sized cheesecakes with a cup of freshly brewed coffee or a smooth dessert wine to complete the experience. If you want to keep things light, a small bowl of mixed fruit or a scoop of vanilla bean ice cream works wonderfully alongside.
Creative Ways to Present
Serve the Mini Crème Brûlée Cheesecakes Recipe on a pretty platter with edible flowers scattered around for an Instagram-worthy look. You can also try layering them in clear glass jars or place them on delicate doilies to elevate their charm. For a fun twist, top with flavored sugars like cinnamon-sugar or crushed pistachios before torching for a nutty surprise.
Make Ahead and Storage
Storing Leftovers
Place any uneaten mini cheesecakes in an airtight container and refrigerate for up to 3 days. Keep the caramelized sugar topping intact by storing them separately or adding the sugar and torching right before serving again.
Freezing
You can freeze these mini treats before adding the brûlée topping. Wrap each cheesecake tightly in plastic wrap, then store in an airtight container or freezer bag for up to one month. Thaw overnight in the fridge and caramelize the topping just before serving for best results.
Reheating
To bring out the freshly torched sugar crunch, it’s best not to microwave. Instead, re-torch the sugar topping with a kitchen torch or briefly place cheesecakes under the broiler (watch closely!) after reheating. Warm them gently at room temperature or in the fridge until just slightly cooled to preserve creamy texture.
FAQs
Can I use a store-bought graham cracker crust instead of making my own?
Absolutely! A ready-made crust can save time and will still taste delicious, though pressing your own crust into muffin cups provides a fresher, homemade touch and lets you control sweetness and thickness.
What if I don’t have a kitchen torch? How can I caramelize the topping?
You can use your oven’s broiler setting to caramelize the sugar. Just sprinkle the sugar on top, place the cheesecakes under the broiler for a few minutes, and keep a close eye so they don’t burn.
Can I make these cheesecakes dairy-free or vegan?
Making this recipe dairy-free or vegan requires alternative ingredients like plant-based cream cheese and sour cream substitutes, plus an egg replacer. The texture and flavor will differ, but experimenting with vegan versions can be fun and rewarding!
How long can I leave the caramelized sugar topping before it gets sticky?
The brûlée topping is best enjoyed within a few hours, as humidity can soften the crisp sugar shell. For best results, caramelize right before serving to maintain that perfect crackly texture.
Can I double this recipe for a larger batch?
Definitely! Simply double all ingredients and use two muffin tins or work in batches. Mini cheesecakes are great for parties, so making extras means more happy guests!
Final Thoughts
I hope you’re as excited as I am to make the Mini Crème Brûlée Cheesecakes Recipe your new favorite dessert. It is truly a little masterpiece, combining the best of creamy cheesecake and the fun, crunchy brûlée topping in a perfectly portable size. Give it a try, share it with your loved ones, and enjoy every luscious bite!
Print
Mini Crème Brûlée Cheesecakes Recipe
- Prep Time: 15 minutes
- Cook Time: 20 minutes
- Total Time: 2 hours 35 minutes
- Yield: 12 mini cheesecakes
- Category: Dessert
- Method: Baking
- Cuisine: American
- Diet: Vegetarian
Description
These Mini Crème Brûlée Cheesecakes combine the creamy richness of classic cheesecake with the caramelized sugar topping of crème brûlée for a delightful dessert. Perfectly portioned as mini cheesecakes on a graham cracker crust, they offer a beautiful balance of textures and flavors, making them ideal for parties or special occasions.
Ingredients
Crust
- 1 cup graham cracker crumbs
- 2 tablespoons granulated sugar
- 1/4 cup melted butter
Cheesecake Filling
- 16 oz cream cheese, softened
- 1/2 cup granulated sugar
- 2 large eggs
- 1 teaspoon vanilla extract
- 1/4 cup sour cream
Topping
- 1/4 cup granulated sugar (for caramelized topping)
Instructions
- Prepare Crust: Preheat the oven to 325°F (160°C). Line a 12-cup muffin tin with paper liners. In a small bowl, mix together graham cracker crumbs, 2 tablespoons sugar, and melted butter until combined. Press about a spoonful of the mixture firmly into the bottom of each muffin cup to form an even crust layer.
- Make Filling: In a large mixing bowl, beat the softened cream cheese and 1/2 cup sugar together until smooth and creamy. Add the eggs one at a time, beating well after each addition, ensuring a smooth mixture. Stir in vanilla extract and sour cream, mixing just until everything is combined without overbeating.
- Fill and Bake: Evenly divide the cheesecake filling among the prepared muffin cups over the crust. Bake in preheated oven for 18-20 minutes, or until the centers are set but still slightly jiggly. Remove from oven and allow cheesecakes to cool completely at room temperature. Once cooled, refrigerate them for at least 2 hours to chill and firm up.
- Caramelize Topping: Just before serving, sprinkle approximately 1 teaspoon of granulated sugar evenly over the top of each chilled mini cheesecake. Using a kitchen torch, caramelize the sugar by heating it until it melts and bubbles to form a golden brown, crisp layer. Let the caramelized sugar cool and harden before serving to achieve the classic crème brûlée crunch.
Notes
- Ensure the cream cheese is softened to room temperature for a smooth filling.
- Do not overbake the cheesecakes; centers should be slightly jiggly when done baking.
- If you do not have a kitchen torch, you can broil the cheesecakes briefly to caramelize the sugar, but watch carefully to avoid burning.
- Let the cheesecakes chill thoroughly to enhance texture and flavor before caramelizing the sugar topping.
- Store any leftovers covered in the refrigerator and consume within 3 days for best freshness.


