

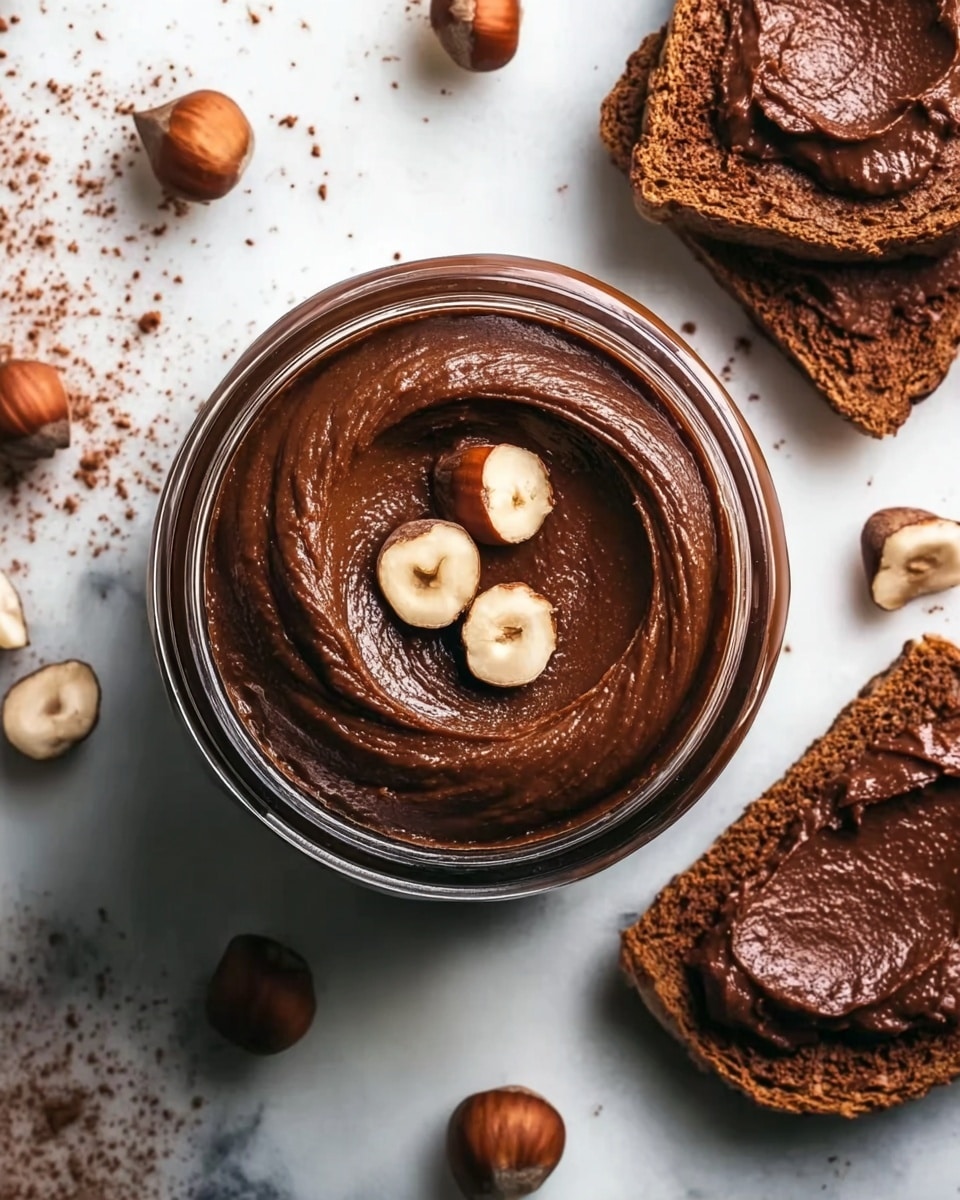
If you’ve ever dreamed of creating a luscious, homemade chocolate delight that perfectly balances rich cacao and nutty goodness, this Cacao and Hazelnut Spread Recipe is an absolute must-try. Imagine that creamy, decadent spread you love from the jar but with the satisfaction of knowing exactly what goes into it—simple, natural ingredients coming together for a treat that’s both wholesome and irresistibly indulgent. Whether you’re spreading it on morning toast or dolloping it onto fresh fruit, this recipe will quickly become one of your top favorites to whip up again and again.

Ingredients You’ll Need
These simple ingredients are the heart of your spread, each one playing a vital role in crafting flavor, texture, and that beautiful, inviting color. Nothing fancy here—just pure, natural goodness that transforms into something extraordinary.
- 2 cups hazelnuts: Roasting these releases their natural oils and deepens their nutty flavor, forming the perfect base for a creamy texture.
- 1/4 cup raw cacao powder: Adds rich, chocolatey bitterness that balances the sweetness and elevates the spread’s depth.
- 2/3 cup maple syrup: A natural sweetener that blends seamlessly to create a smooth, luscious finish with a subtle hint of caramel.
- Sliced toasted fruit loaf (for serving): The perfect canvas for scooping up this luxurious spread, with a slight crunch complementing the creamy consistency.
How to Make Cacao and Hazelnut Spread Recipe
Step 1: Roast the Hazelnuts
Start by preheating your oven to 160°C (325°F) for even roasting. Spread the hazelnuts out on a baking tray and roast for 8 to 10 minutes. Keep a close eye as they turn golden, releasing their sweet, toasty aroma that will fill your kitchen and have you eager to proceed.
Step 2: Remove the Skins
Once out of the oven, transfer the warm hazelnuts to a clean tea towel. Rub them vigorously to slip off most of the skins. This step is crucial because it removes any bitterness and provides a silky texture to your spread—don’t worry if some skins remain, as they add a rustic charm.
Step 3: Process the Hazelnuts and Cacao
Pop the warm, peeled hazelnuts into your food processor along with the raw cacao powder. Blend these together for 4 to 6 minutes. During this time, the nuts break down from crunchy bits into a smooth, nutty butter, warmly infused with chocolatey richness.
Step 4: Sweeten It Up
With the food processor running, steadily pour in the maple syrup. This gradual addition allows everything to mix evenly, creating that perfectly luscious, spreadable texture. It’s like magic watching the texture transform before your eyes!
Step 5: Cool and Serve
Transfer your homemade cacao and hazelnut spread into a bowl and let it cool down to room temperature. Once ready, dollop generously onto slices of toasted fruit loaf for a morning treat, an afternoon snack, or even a cheeky dessert fix.
How to Serve Cacao and Hazelnut Spread Recipe
Garnishes
Adding a touch of garnish can really elevate your presentation. Sprinkle a pinch of flaky sea salt over the spread to enhance the natural sweetness and deepen the flavor complexity. Alternatively, chopped toasted hazelnuts bring a delightful crunch and rustic look that screams homemade charm.
Side Dishes
This spread isn’t just perfect on fruit loaf. Try pairing it with crisp apple or pear slices for a refreshing contrast, or swirl it into warm oatmeal for a creamy, nutty breakfast boost. You can even spread it onto pancakes or waffles for a decadently nutty twist on classic brunch fare.
Creative Ways to Present
Bring a bit of fun and artistry to your table by serving your Cacao and Hazelnut Spread Recipe in small bowls alongside a DIY toast bar. Surround it with an array of fresh fruits, nuts, and seeds for a beautiful, interactive snack setup. Or use it as a base layer inside cupcakes or sandwich it in crepes for a surprising delight.
Make Ahead and Storage
Storing Leftovers
Store your cacao and hazelnut spread in an airtight container in the fridge. It keeps well for up to two weeks, maintaining its creamy texture and fresh flavor. Before using, just bring it to room temperature or give it a quick stir if it has thickened slightly.
Freezing
If you’ve made a big batch, freezing is a great option. Spoon the spread into a freezer-safe container and freeze for up to three months. Thaw overnight in the fridge and stir well before serving to restore that smooth consistency.
Reheating
If your spread has firmed up too much in the fridge or freezer, gently warm it by placing the jar or bowl in a bowl of hot water for a few minutes. Stir occasionally until it becomes soft and spreadable again—just be careful not to overheat, as you want to preserve all those lovely fresh flavors.
FAQs
Can I use roasted hazelnuts instead of raw?
Absolutely! Roasted hazelnuts can save you a step, and they still work wonderfully in this recipe. Just be sure they’re unsalted and unflavored to keep the natural taste of the spread shining.
Is there a substitute for maple syrup?
You can swap maple syrup with honey, agave nectar, or even coconut sugar syrup. Just keep in mind that each option will bring its own subtle flavor nuances, so choose the one that suits your taste best.
Can I make this recipe nut-free?
This recipe relies on hazelnuts for its signature flavor and texture, so nut-free versions would require different ingredients. However, experimenting with seeds like sunflower or pumpkin could be an alternative if you’re up for trying something new.
How long will this spread last at room temperature?
Because it contains natural ingredients and no preservatives, it’s best to keep the spread refrigerated. At room temperature, it should be safe for a few hours, but for longevity and safety, refrigeration is recommended.
Can I add other flavors to the spread?
Definitely! Vanilla extract, sea salt, or a pinch of cinnamon all pair beautifully with cacao and hazelnuts, allowing you to customize the spread to your liking. Just add them during processing for the smoothest blend.
Final Thoughts
Making your own Cacao and Hazelnut Spread Recipe is such a warm and rewarding experience—the scent of roasting nuts, the silky blend of chocolate and sweetness, and that first irresistible taste all combine to create a truly special treat. I can’t encourage you enough to try this at home; it’s more than just a spread, it’s a little jar of happiness you’ll crave every day.
Print
Cacao and Hazelnut Spread Recipe
- Prep Time: 10 minutes
- Cook Time: 10 minutes
- Total Time: 20 minutes
- Yield: Approximately 1.5 cups
- Category: Spread
- Method: Baking
- Cuisine: International
- Diet: Vegetarian
Description
A rich and creamy cacao and hazelnut spread that combines the deep flavors of roasted hazelnuts with raw cacao powder and natural sweetness from maple syrup. Perfect as a delightful topping for toasted fruit loaf or your favorite bread.
Ingredients
Spread Ingredients
- 2 cups hazelnuts
- 1/4 cup raw cacao powder
- 2/3 cup maple syrup
Serving
- Sliced toasted fruit loaf (for serving)
Instructions
- Roast Hazelnuts: Preheat your oven to 160°C (325°F). Spread the hazelnuts evenly on a baking tray and roast for 8-10 minutes until they turn golden and fragrant.
- Remove Skins: Place the roasted hazelnuts on a clean tea towel. Rub them vigorously to remove as much of the skins as possible, which will improve texture and flavor.
- Process Nuts and Cacao: Transfer the warm hazelnuts to a food processor. Add the raw cacao powder and process for 4-6 minutes, until the nuts are ground into a smooth paste.
- Add Sweetener: While the processor is running, slowly pour in the maple syrup, continuing to blend until well combined and the spread is smooth.
- Cool and Serve: Spoon the spread into a bowl and allow it to cool to room temperature. Serve generously on toasted fruit loaf slices for a delicious treat.
Notes
- For best flavor, use fresh, high-quality raw cacao powder and pure maple syrup.
- Removing the hazelnut skins helps prevent bitterness and creates a smoother spread.
- Store the spread in an airtight container in the refrigerator for up to 2 weeks.
- You can substitute fruit loaf with other breads like brioche, baguette, or crackers according to preference.
- For a nuttier texture, pulse less in the food processor; for a creamier texture, blend longer.


