

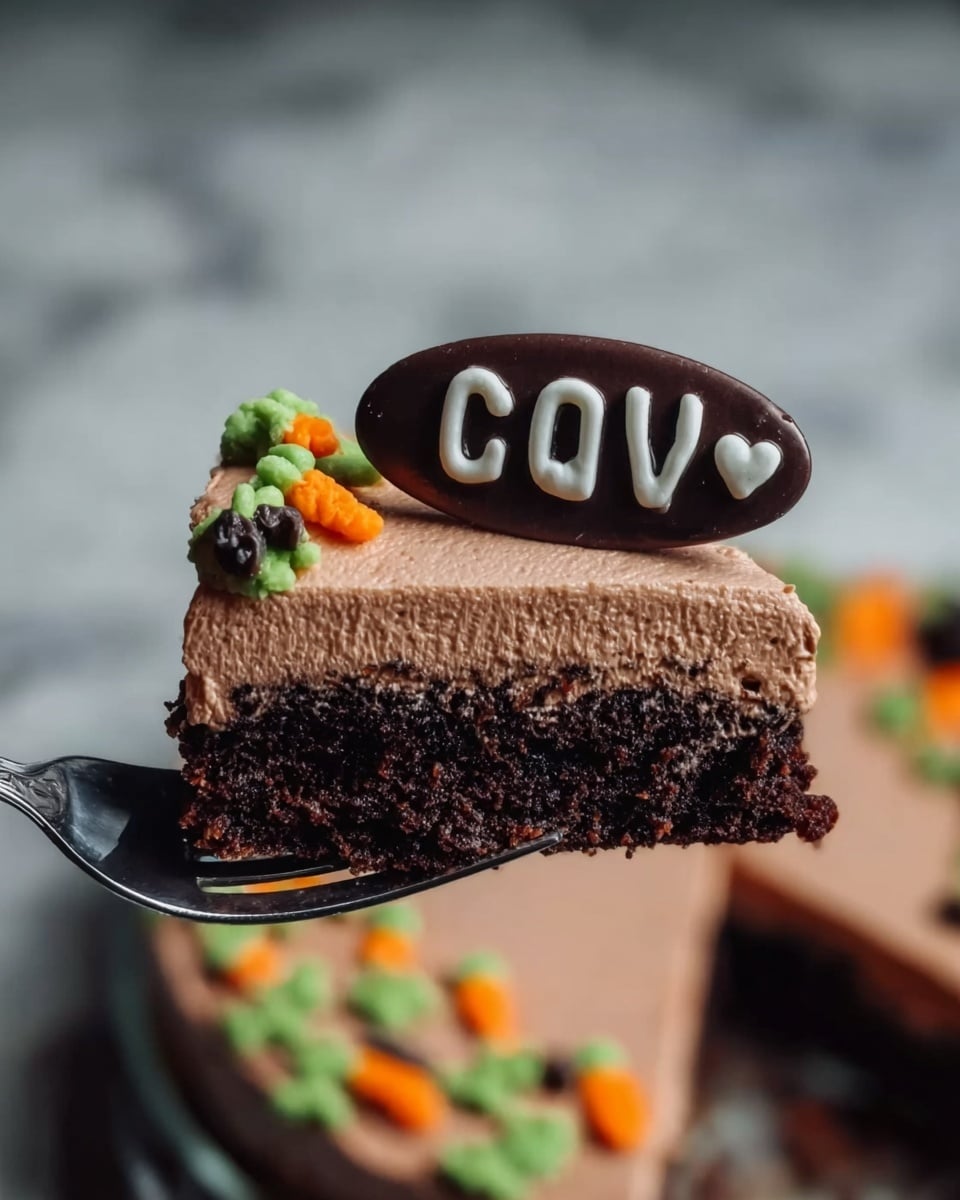
If you’re looking for a fun, festive, and delightfully indulgent treat this season, the Brownie Dirt Pudding Cups with Halloween Decorations Recipe is an absolute must-try. This playful dessert perfectly blends rich, fudgy brownies with silky chocolate pudding and a crunchy cookie “dirt” topping, crowned with whimsical Halloween candies. It’s the kind of recipe that brings joy both in making and sharing, and it’s sure to be a hit with kids and adults alike at any spooky gathering or cozy family night.

Ingredients You’ll Need
These ingredients are straightforward, each playing a critical role in the delicious texture and flavor layers of the Brownie Dirt Pudding Cups with Halloween Decorations Recipe. From the fudgy brownie base to the creamy pudding and crunchy cookie topping, every component adds something special that creates the perfect bite every time.
- Brownie mix (or homemade brownies): The foundation of the dessert, offering chewy, chocolatey richness that holds everything together.
- Instant chocolate pudding mix (3.9 oz): Creates a smooth, decadent pudding layer that’s simple to whip up.
- Cold milk (2 cups): Essential for setting the pudding, giving it a creamy texture without heaviness.
- Sweetened condensed milk (14 oz can): Adds sweetness and helps create a luscious, velvety pudding.
- Whipped topping (8 oz, thawed): Lightens the pudding layer, making it fluffy and dreamy.
- Chocolate sandwich cookies (about 15): Crushed to mimic dirt, adding crunch and an extra chocolate dimension.
- Gummy worms, candy pumpkins, or Halloween-themed candies: These fun decorations bring the spooky vibe and playful textures.
- Paper headstones (optional): For a charming, creative presentation to complete your Halloween dirt cup graveyard.
How to Make Brownie Dirt Pudding Cups with Halloween Decorations Recipe
Step 1: Prepare the Brownies
Start by baking your brownies following the package instructions or your favorite homemade recipe. Once baked, let them cool completely — this ensures they hold their shape when layering and won’t melt the pudding later.
Step 2: Cut or Crumble the Brownies
After cooling, slice the brownies into small squares or crumble them into bite-sized pieces. This flexibility lets you decide if you want distinct brownie chunks or a more blended texture in your dirt pudding cups.
Step 3: Whisk the Pudding Mix
In a large bowl, whisk the instant chocolate pudding mix with cold milk until smooth. Give it a couple of minutes to thicken, which creates that perfect pudding consistency that’s rich but not too dense.
Step 4: Fold in Sweetened Condensed Milk and Whipped Topping
Add the sweetened condensed milk and whipped topping to the pudding mixture. Gently folding these in makes the pudding incredibly creamy and airy, balancing sweetness and texture beautifully.
Step 5: Assemble the Layers
Grab your individual cups or a big clear dish, and start by layering the crumbled brownies at the bottom. This base anchors the dessert and adds a chewy surprise beneath the silky pudding.
Step 6: Add the Pudding Layer
Spoon the luscious chocolate pudding over the brownie pieces evenly. This layer brings a luscious creaminess that perfectly complements the brownie’s fudginess.
Step 7: Sprinkle the Cookie “Dirt” Topping
Top everything with the crushed chocolate sandwich cookies. Their crumbly texture looks like dirt, adding crunch and that classic chocolatey flavor beneath your Halloween decorations.
Step 8: Decorate for the Season
Now comes the best part — decorating! Scatter gummy worms, candy pumpkins, or other Halloween-themed candies on top to transform your cups into fun, spooky graveyards.
Step 9: Add Optional Paper Headstones
For an extra festive touch, print and cut out small paper headstones, attach them to toothpicks, and place them upright among the “dirt.” This step turns your dessert into a Halloween centerpiece that’s as creative as it is delicious.
Step 10: Serve and Enjoy
Serve these cups immediately for the freshest textures, or refrigerate them until ready. Pair with a cold glass of chocolate milk for a nostalgic, indulgent pairing everyone will love.
How to Serve Brownie Dirt Pudding Cups with Halloween Decorations Recipe
Garnishes
Beyond the candy worms and pumpkins, you can sprinkle mini chocolate chips, edible glitter, or crushed colored cookies for an extra pop of texture and festive color. Using plastic spiders or candy eyeballs also amps up the fun factor!
Side Dishes
To complement the rich sweetness of the pudding cups, consider serving light and refreshing sides like a crisp green salad or fresh fruit salad. This balances the dessert and keeps your party spread well-rounded.
Creative Ways to Present
Try serving these cups in mini mason jars or clear plastic cups for easy handling at parties. Layering them in a trifle bowl creates a dramatic, shareable dessert centerpiece. Using Halloween-themed serving trays or placing each cup on a small spooky plate can turn the presentation into part of the celebration.
Make Ahead and Storage
Storing Leftovers
If you have leftovers, cover the pudding cups with plastic wrap or airtight lids and refrigerate. They will stay fresh for up to 3 days, and the flavors actually meld wonderfully after a day or two.
Freezing
While freezing isn’t ideal because the whipped topping can lose its texture upon thawing, you can freeze the brownie base separately. Then assemble the dirt pudding cups fresh for best texture and flavor.
Reheating
Since this is a chilled dessert, reheating isn’t recommended. Instead, allow refrigerated cups to sit out for 10–15 minutes at room temperature before serving if they’ve been too firm in the fridge.
FAQs
Can I use homemade brownies instead of a boxed mix?
Absolutely! Homemade brownies add a personal touch and can be tailored to your favorite flavor profile. Just ensure they’re cooled completely before assembling your cups.
What if I don’t have instant pudding mix?
You can make a homemade chocolate pudding from scratch, but instant pudding mix is the quickest and easiest option for this recipe, helping achieve the perfect consistency.
Can I substitute the sweetened condensed milk?
Sweetened condensed milk adds richness and sweetness; you can try using evaporated milk with added sugar, but the texture may differ slightly.
Are there alternatives to the crushed cookies for the “dirt” layer?
Yes! Crushed chocolate graham crackers or chocolate wafer cookies also work well to mimic dirt in texture and flavor.
How long before serving can I assemble these cups?
For the best texture, assemble them up to 4 hours before serving and keep refrigerated. This timing helps flavors marry without losing the lovely texture contrasts.
Final Thoughts
Making the Brownie Dirt Pudding Cups with Halloween Decorations Recipe is not just about creating a delicious treat; it’s about celebrating the fun, creativity, and joy that comes with sharing food you love. Whether you’re hosting a party or just want a festive dessert to brighten your day, this recipe promises smiles, laughs, and plenty of chocolatey goodness. So go ahead and make these spooky cups your new seasonal favorite — your taste buds and guests will thank you!
Print
Brownie Dirt Pudding Cups with Halloween Decorations Recipe
- Prep Time: 20 minutes
- Cook Time: 30-35 minutes (for baking brownies)
- Total Time: 55-60 minutes
- Yield: 8 to 10 individual cups
- Category: Dessert
- Method: Baking
- Cuisine: American
Description
This Brownie Dirt Pudding is a fun and spooky dessert perfect for Halloween or any occasion that calls for a playful treat. Layers of fudgy brownies, creamy chocolate pudding made with instant mix and sweetened condensed milk, topped with crushed chocolate sandwich cookies to mimic dirt, and festive Halloween candies create a delicious and visually appealing dessert that’s easy to assemble and sure to delight both kids and adults.
Ingredients
Brownie Base
- 1 box of brownie mix (or your favorite homemade brownie recipe)
Pudding Layer
- 1 package (3.9 oz) instant chocolate pudding mix
- 2 cups cold milk
- 1 can (14 oz) sweetened condensed milk
- 1 container (8 oz) whipped topping, thawed
Toppings
- 15 chocolate sandwich cookies, crushed (like Oreos)
- Gummy worms, candy pumpkins, or other Halloween-themed candies
- Paper headstones (optional)
Instructions
- Prepare the Brownies: Follow the instructions on the boxed brownie mix or your homemade brownie recipe. Bake the brownies according to the directions and allow them to cool completely to prevent melting the pudding layer.
- Cut or Crumble Brownies: Once cooled, cut the brownies into small squares or crumble them into pieces to create the base layer for the dessert cups.
- Make the Pudding Layer: In a large mixing bowl, whisk together the instant chocolate pudding mix and cold milk until well combined. Let it sit for 2 minutes to thicken properly.
- Add Sweetened Condensed Milk and Whipped Topping: Add the sweetened condensed milk and the thawed whipped topping to the pudding mixture. Gently fold them in until the mixture is smooth and creamy without deflating the whipped topping.
- Assemble the Brownie Dirt Pudding Cups: In individual cups or a large serving dish, layer the crumbled brownies as the base to simulate soil.
- Add the Pudding Layer: Spoon the prepared chocolate pudding mixture over the brownie layer carefully to create distinct layers.
- Top with Crushed Cookies: Sprinkle the crushed chocolate sandwich cookies over the pudding layer to resemble dirt, adding texture and flavor.
- Decorate: For a spooky Halloween touch, decorate the top with gummy worms, candy pumpkins, or other Halloween-themed candies to create a fun and festive look.
- Add Paper Headstones (Optional): If using paper headstones, print and cut them out, then attach them to toothpicks and insert them into the “graveyard” pudding cups for a charming decoration.
- Serve: Serve the dessert immediately with a cold glass of chocolate milk, or refrigerate the individual cups until ready to serve for a chilled treat.
Notes
- Ensure brownies are completely cooled before assembling to avoid melting the pudding layer.
- You can substitute homemade brownies if preferred.
- For a dairy-free version, use dairy-free pudding mix, whipped topping, and milk alternatives.
- Make ahead and refrigerate for up to 24 hours; add candy decorations just before serving for best appearance.
- Use crushed cookies without filling if you want less sweetness in the “dirt” topping.

