

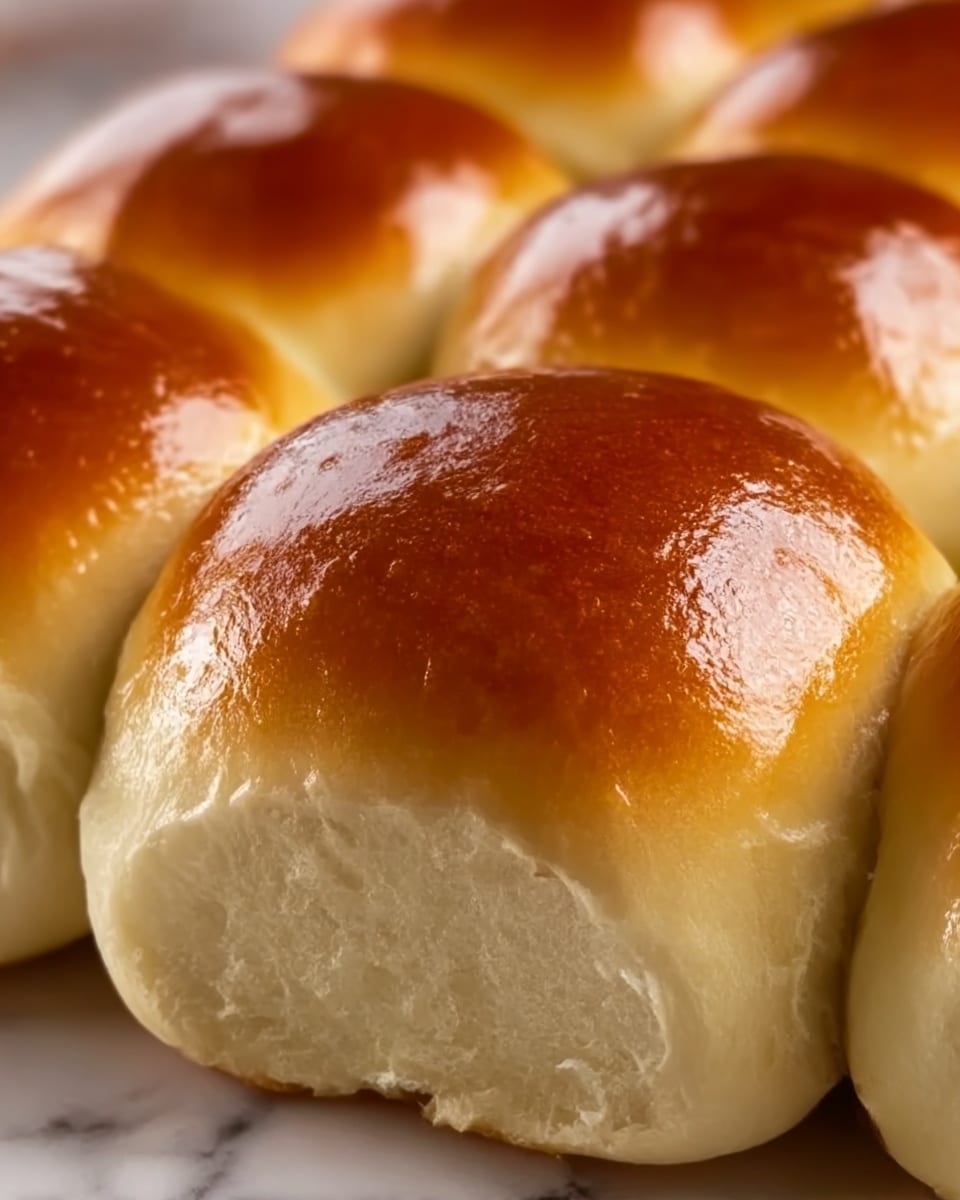
If you’ve ever wanted to master a classic that fills your kitchen with the irresistible aroma of fresh-baked bread, this Old Fashioned Yeast Rolls Recipe is exactly what you need. Soft, fluffy, and perfectly golden brown, these rolls are a nostalgic treat that bring warmth and comfort to any meal. Whether you’re serving them alongside a hearty stew or enjoying them slathered in butter, these yeast rolls stand out with their tender crumb and lightly sweet flavor, making them a timeless favorite you’ll want to make repeatedly.

Ingredients You’ll Need
The beauty of this recipe lies in its simplicity and the quality of each ingredient, which all play a crucial role in creating the perfect texture and flavor of your rolls. From the warmth of the milk to activate the yeast, to the richness of butter, each component complements the other beautifully.
- Warm water (110°F/43°C): The ideal temperature to help the yeast activate and bubble to life, giving your rolls their rise.
- Active dry yeast (1 packet): The magic ingredient that makes your dough rise, creating those fluffy layers.
- Granulated sugar (1/4 cup): Provides just the right hint of sweetness and feeds the yeast for a perfect rise.
- Whole milk, warmed (1/2 cup): Adds richness and moisture, contributing to the tender crumb of each roll.
- Unsalted butter, softened (1/4 cup): Enriches the dough with flavor and keeps the rolls irresistibly soft.
- Large egg (1): Acts as a binder and adds a lovely golden color to your rolls.
- Salt (1 teaspoon): Enhances all the other flavors and balances the sweetness from the sugar.
- All-purpose flour (3 1/2 to 4 cups): The base of your dough, providing structure and chew. Start with 3 1/2 cups and add more if needed.
- Melted butter (2 tablespoons for brushing): Gives the finished rolls a beautiful shine and an extra layer of buttery goodness.
How to Make Old Fashioned Yeast Rolls Recipe
Step 1: Activate the Yeast
Begin by combining the warm water and a pinch of sugar in a small bowl. Sprinkle the yeast over the top and let it sit for about 5 minutes until it’s foamy and bubbling. This signals that the yeast is active and ready to do its work in the dough.
Step 2: Prepare the Dough
In a large mixing bowl, whisk together the sugar, warm milk, softened butter, egg, and salt until well combined. Then stir in the activated yeast mixture. Slowly add the flour, starting with 3 1/2 cups, mixing thoroughly as you go. The dough should come together and form a soft, slightly sticky ball. Add more flour if needed, but be careful not to make it too dry.
Step 3: Knead Until Smooth
Turn your dough out onto a floured surface and knead for about 8 to 10 minutes. This step develops the gluten in the dough, giving your rolls a springy, tender texture. You’ll know it’s ready when the dough is smooth and elastic, no longer sticking heavily to your hands.
Step 4: Let the Dough Rise
Place the dough in a greased bowl and cover it loosely with a clean kitchen towel or plastic wrap. Find a warm spot in your kitchen and allow the dough to rise for about 1 to 1 1/2 hours, or until it has doubled in size. This slow rise is what gives these rolls their light fluffiness and deep flavor.
Step 5: Shape the Rolls
Gently punch down the dough to release excess air, then divide it into 12 equal pieces. Roll each piece into a smooth ball and place them in a greased 9×13-inch baking pan. Space them evenly but close enough so they’ll bake into soft rolls that touch each other.
Step 6: Second Rising
Cover the pan again and let the rolls rise for another 30 to 45 minutes. This final rise helps the rolls become extra soft and pillowy when baked.
Step 7: Bake to Perfection
Preheat your oven to 375°F (190°C). Bake the rolls for 20 to 25 minutes, or until their tops are golden brown and a gentle tap sounds hollow. Immediately brush the hot rolls with melted butter to lock in moisture and add a delicious sheen.
How to Serve Old Fashioned Yeast Rolls Recipe
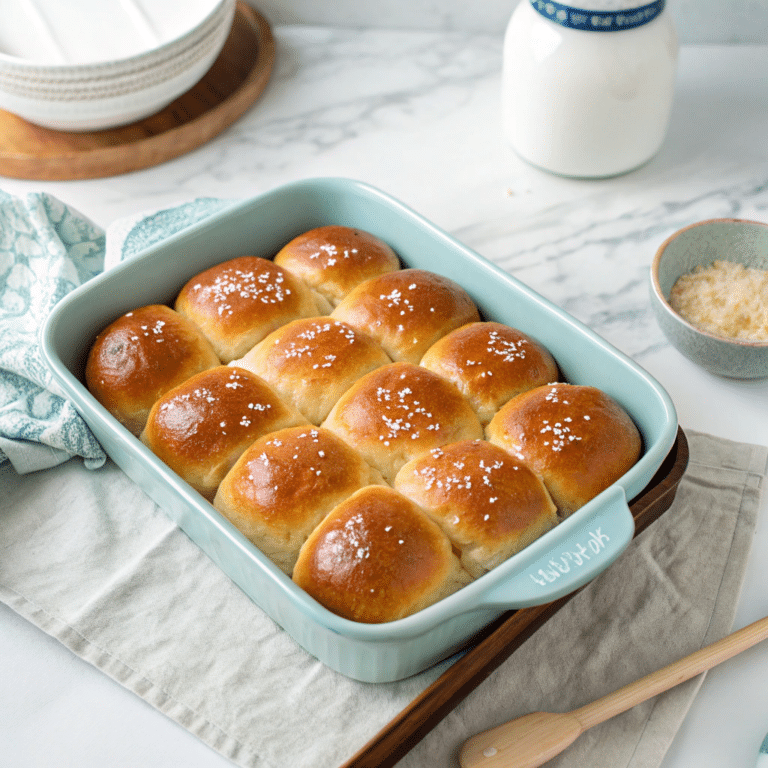
Garnishes
Brushed with melted butter right after baking, these rolls shine beautifully and taste even better. For a special touch, sprinkle a bit of flaky sea salt or a sprinkle of fresh herbs like rosemary or thyme on top immediately before serving to elevate their flavor further.
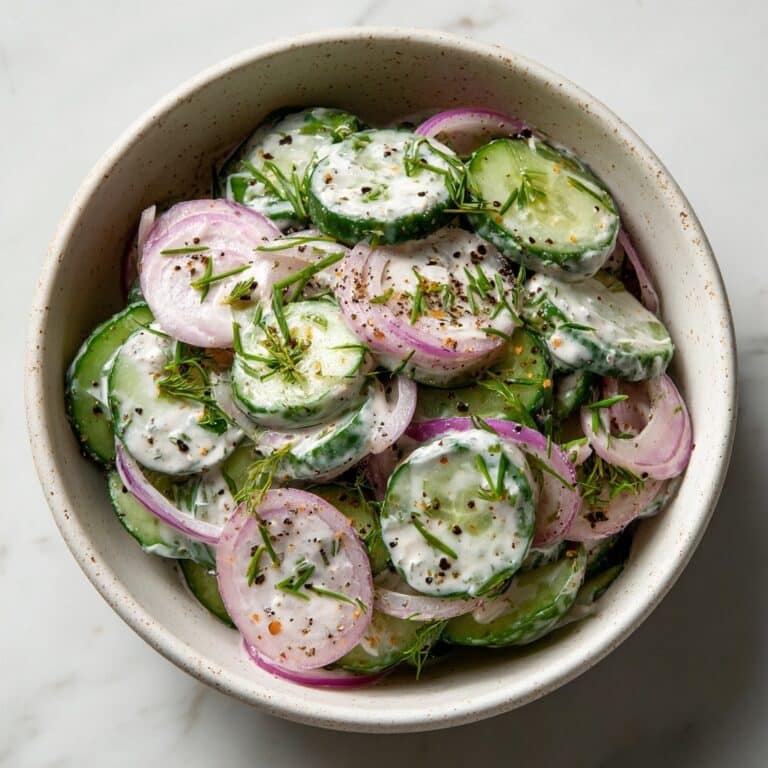
Side Dishes
These rolls are the ultimate companion for soups, stews, and hearty salads. Imagine dunking them in a rich beef stew or serving alongside a roasted chicken dinner. Their soft texture and lightly sweet flavor complement savory dishes wonderfully.
Creative Ways to Present
For a fun presentation, serve the rolls in a basket lined with a rustic linen napkin or arrange them in a pull-apart cluster on a wooden board. You can also slide in small bowls of flavored butter—think honey cinnamon or garlic herb—to create an inviting, communal feast.
Make Ahead and Storage
Storing Leftovers
If you have any leftover rolls, wrap them tightly in plastic wrap or store in an airtight container at room temperature for up to two days. To prevent staleness, avoid refrigerating, as it can dry out the bread.
Freezing
These rolls freeze beautifully. After baking and completely cooling, place them in a freezer-safe bag or container, separating layers with parchment paper to prevent sticking. They keep fresh in the freezer up to three months, perfect for making ahead during the busy holiday season.
Reheating
Rewarm rolls by wrapping them in foil and heating in a 350°F (175°C) oven for about 10 to 15 minutes. Alternatively, a quick zap in the microwave wrapped in a damp paper towel also works well to regain that fresh-baked softness.
FAQs
Can I use instant yeast instead of active dry yeast in this Old Fashioned Yeast Rolls Recipe?
Yes! Instant yeast can be substituted in equal amounts and mixed directly with the dry ingredients. Just be sure to reduce the warm water slightly since instant yeast doesn’t need to be activated in water.
What if my dough is too sticky to handle?
That’s quite normal, especially when you start mixing. Add flour a tablespoon at a time during kneading until the dough feels soft but not sticky. Avoid adding too much flour as it can make rolls dense.
Can I make these rolls without eggs?
Eggs add richness and structure, but you can omit them if needed by slightly increasing the butter and adding a tablespoon of milk powder to help with texture. The rolls will be a bit different but still delicious!
How do I know when the rolls are fully risen?
The dough should roughly double in size and look puffed. You can do a “poke test”: lightly press a finger into the dough, and if the indentation springs back slowly, it’s ready to bake.
Can I add herbs or cheese to the dough?
Absolutely! Folding in fresh herbs like rosemary, thyme, or even shredded cheese before the first rise can add fantastic flavor and make your Old Fashioned Yeast Rolls Recipe uniquely yours.
Final Thoughts
Nothing quite beats the comforting, homemade goodness of these rolls fresh from the oven. This Old Fashioned Yeast Rolls Recipe is a rewarding project that fills your home with warm aromas and your table with soft, buttery rolls loved by everyone. Once you try them, they’ll surely become a staple in your baking repertoire to share with family and friends.
Print
Old Fashioned Yeast Rolls Recipe
- Prep Time: 30 minutes
- Cook Time: 20 minutes
- Total Time: 2 hours 30 minutes
- Yield: 12 rolls
- Category: Bread
- Method: Baking
- Cuisine: American
Description
These Old Fashioned Yeast Rolls are soft, fluffy, and slightly sweet, perfect for accompanying any meal or enjoying with butter and jam. Made with simple pantry ingredients, these classic homemade rolls take a bit of time but reward you with warm, fresh bread that’s tender on the inside with a golden crust.
Ingredients
Dough Ingredients
- 1/2 cup warm water (110°F/43°C)
- 1 packet active dry yeast (about 2 1/4 teaspoons)
- 1/4 cup granulated sugar
- 1/2 cup whole milk, warmed
- 1/4 cup unsalted butter, softened
- 1 large egg
- 1 teaspoon salt
- 3 1/2 to 4 cups all-purpose flour (start with 3 1/2 cups and add more as needed)
Finishing
- 2 tablespoons melted butter (for brushing)
Instructions
- Activate Yeast: In a small bowl, combine the warm water with the active dry yeast and a pinch of sugar. Let it sit for about 5-10 minutes until the mixture becomes foamy, indicating that the yeast is active.
- Mix Wet Ingredients: In a large bowl, whisk together the warm milk, softened butter, granulated sugar, egg, and salt until well combined.
- Combine and Add Flour: Stir the activated yeast mixture into the wet ingredients. Gradually add 3 1/2 cups of flour, mixing until the dough starts to come together. Add up to an additional 1/2 cup flour as needed to form a soft, slightly sticky dough that pulls away from the sides of the bowl.
- Knead the Dough: Turn the dough onto a floured surface and knead for about 8-10 minutes until smooth and elastic. Alternatively, use a stand mixer fitted with a dough hook for 5-7 minutes.
- 1st Rise: Place the dough in a greased bowl, cover with a clean kitchen towel or plastic wrap, and let it rise in a warm, draft-free spot for about 1 to 1 1/2 hours, or until doubled in size.
- Shape Rolls: Punch down the dough and divide it into 12 equal pieces. Shape each piece into a smooth ball and place them in a greased 9×13-inch baking dish or on a parchment-lined baking sheet, spacing them slightly apart.
- 2nd Rise: Cover the shaped rolls and let them rise again for 30-45 minutes, until puffy and nearly doubled.
- Bake: Preheat the oven to 375°F (190°C). Bake the rolls for 15-20 minutes, or until golden brown on top and cooked through.
- Brush with Butter and Cool: Remove the rolls from the oven and immediately brush them with melted butter to add flavor and keep the crust soft. Let the rolls cool slightly before serving.
Notes
- Use warm liquids (water and milk) to activate the yeast but avoid temperatures above 115°F to prevent killing the yeast.
- If you prefer softer crusts, cover the rolls with a clean towel right after baking instead of letting them cool uncovered.
- Rolls can be stored in an airtight container at room temperature for up to 2 days or frozen for up to 1 month.
- For a shiny top, you can brush the rolls with an egg wash (1 egg beaten with 1 tablespoon water) before baking.
- Make sure not to add too much flour; the dough should be slightly sticky for the best texture.


