
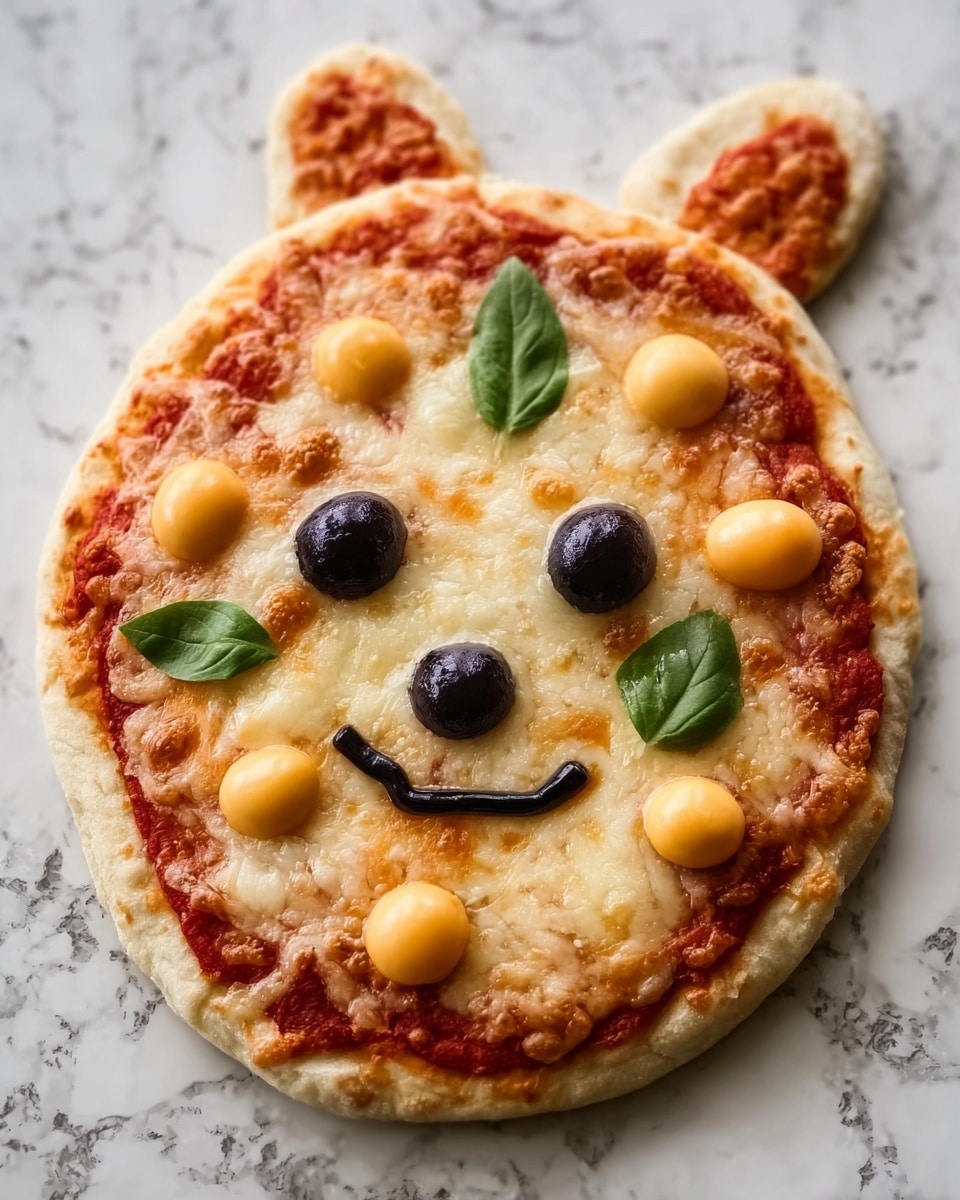
If you are looking to add a touch of whimsy and delight to your dinner table, the Bunny Pizza Recipe is your new best friend. This charming, visually captivating pizza combines fun with flavor, featuring a soft golden crust, melty mozzarella, and a creative arrangement of fresh veggies that bring a playful bunny face to life. It’s not just a feast for your taste buds but also a joy to craft and share with family or friends, perfect for any occasion that needs a little extra cheer.

Ingredients You’ll Need
The Bunny Pizza Recipe calls for simple ingredients that come together beautifully, each bringing unique textures, colors, and flavors. From the creamy mozzarella that blankets the dough to the crisp fresh veggies that form the bunny’s face, every item plays an essential role in making this dish both delightful to look at and delicious to eat.
- Pizza dough: Use either store-bought or homemade dough as the soft, chewy base of your pizza.
- Pizza sauce: A classic sauce spread evenly for a tangy and rich base layer.
- Shredded mozzarella cheese: Provides gooey, melty goodness that pulls everything together.
- Sliced black olives: Perfect for creating detailed features like the bunny’s eyes and nose with their striking color.
- Small red bell pepper: Adds bright color and sweetness, shaping the bunny’s mouth and cheeks.
- Small cucumber: Crisp and refreshing, the cucumber petals form the whiskers and ears.
- Medium carrot: For the bunny’s nose, its vibrant orange color adds a lovely pop.
- Fresh parsley or basil: Fresh greens to garnish your pizza with a burst of herbal brightness.
- Olive oil: Brushing the crust before serving adds flavor and a beautiful shine.
How to Make Bunny Pizza Recipe
Step 1: Preheat the Oven
Set your oven to a steamy 475°F (245°C) to ensure the pizza cooks quickly and evenly. Prepare a baking sheet by lining it with parchment paper or applying a light grease to prevent sticking and help create a perfectly crispy crust.
Step 2: Prepare the Pizza Dough
Roll out your pizza dough on a floured surface to form a circle or oval shape. Transferring to the baking sheet, you’ll start to see the canvas for your bunny take shape. The dough should be evenly rolled for a consistent bake.
Step 3: Form the Bunny Shape
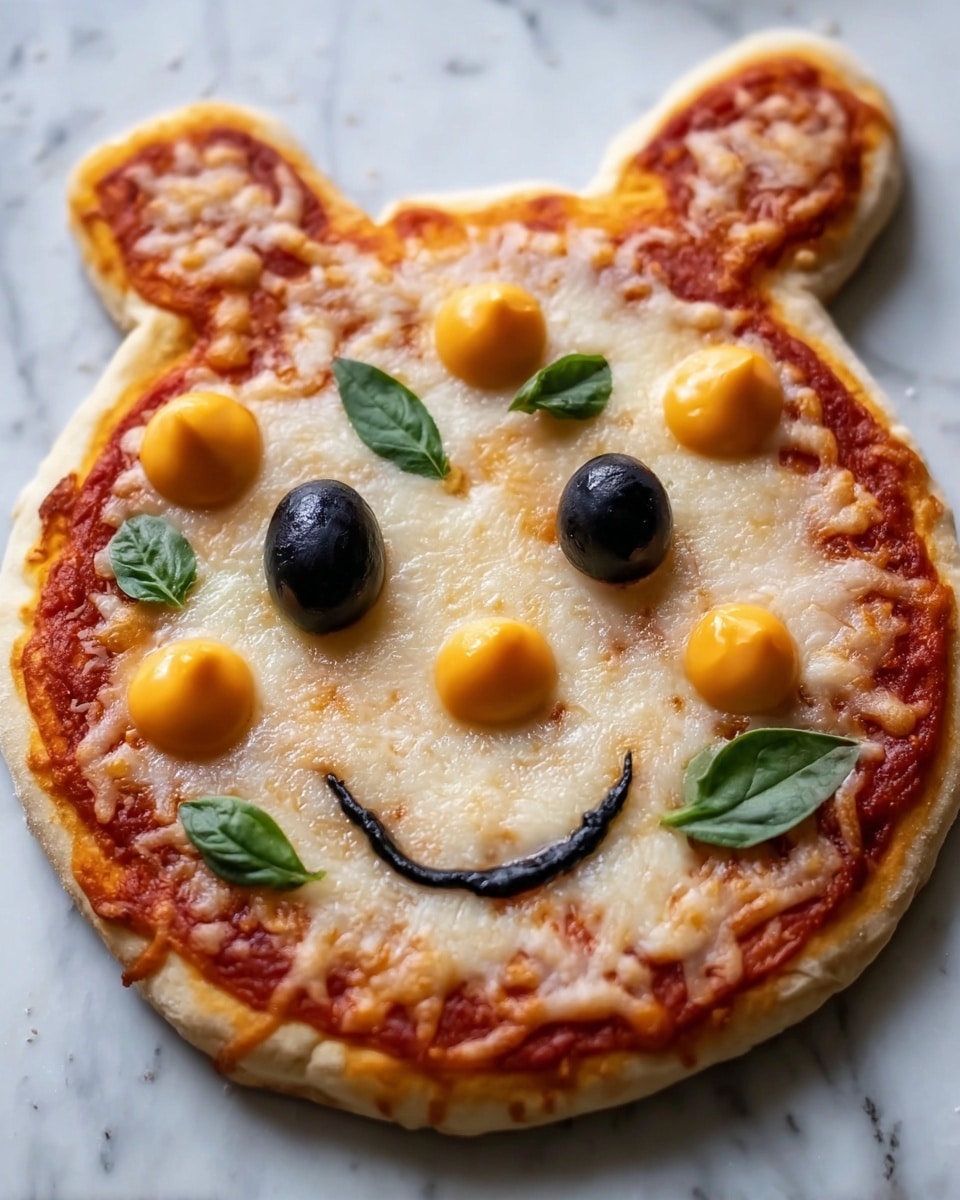
Carefully shape the pizza dough into an oval to mimic the bunny’s face. For additional personality, create two elongated pieces for the ears and attach them gently on top of the main oval. Whether you freehand this or use a template, fun is the name of the game here!
Step 4: Spread the Pizza Sauce
Using the back of a spoon, spread the pizza sauce evenly over the dough, making sure to leave a small border around the edges to form your crust. This ensures every bite bursts with that tangy tomato goodness.
Step 5: Add the Cheese
Generously coat the sauce with shredded mozzarella cheese, ensuring the entire surface is covered. The cheese will melt beautifully, providing a luscious base and helping the bunny’s toppings meld seamlessly.
Step 6: Create the Bunny’s Face
Now for the best part—bringing your bunny to life! Use slices of black olives to fashion two round eyes and a small, centered nose. These details give your pizza character and a delightful look.
Step 7: Shape the Mouth and Cheeks
Cut a thin slice of red bell pepper to form a smiling mouth just below the nose, curving it in an endearing way. Add small slices of red bell pepper on either side as rosy cheeks to complete the facial expression.
Step 8: Arrange the Whiskers
Slice the cucumber into thin strips and arrange them around the bunny’s face as whiskers, adding a fresh crunch and enhancing the playful look of your pizza.
Step 9: Create the Bunny’s Ears
For the ears, place cucumber slices at the top of the pizza dough in elongated shapes. Add carrot slices inside the cucumber outlines for a lovely contrast that mimics the soft inner ear detail.
Step 10: Bake the Pizza
Pop your bunny-shaped pizza into the oven for about 10 to 15 minutes, or until the crust turns golden and the cheese is bubbly and perfectly melted, delivering a tantalizing aroma.
Step 11: Finishing Touches
Brush the crust with olive oil right after baking to create an appetizing, glossy finish. Garnish with fresh parsley or basil to add a vibrant splash of green and an herbal hint to every slice.
Step 12: Serve and Enjoy
Slice your adorable Bunny Pizza Recipe up and dig in! This dish is sure to bring smiles to all your loved ones, making dinner time extra special and memorable.
How to Serve Bunny Pizza Recipe
Garnishes
Fresh herbs like parsley or basil not only add color but also a bright, refreshing flavor that complements the rich cheese and tangy sauce. Don’t be shy about adding a few extra leaves for that perfect finish.
Side Dishes
A light, crisp salad with a zesty vinaigrette balances the cheesy richness of the Bunny Pizza Recipe. You could also serve with a bowl of warm soup or roasted veggies for a heartier meal.
Creative Ways to Present
Serve the pizza on a rustic wooden board or on colorful plates to highlight the playful design. For kids’ parties, pair the pizza with bunny-shaped napkins and cups for a themed feast that’s as fun to look at as it is to eat.
Make Ahead and Storage
Storing Leftovers
Store any leftover Bunny Pizza Recipe in an airtight container or wrap it tightly with foil. It will keep well in the refrigerator for up to 2 days while maintaining its flavors and texture.
Freezing
If you want to save some for later, freeze the fully assembled but unbaked pizza. Wrap it securely in plastic wrap and foil, and store in the freezer for up to one month. When ready, bake it straight from frozen, adding a few extra minutes to the bake time.
Reheating
Reheat leftovers in a preheated oven at 375°F (190°C) for about 8-10 minutes to restore crispness and melt the cheese anew. Avoid microwaving if you want to keep that lovely crust texture intact.
FAQs
Can I use a different cheese for the Bunny Pizza Recipe?
Absolutely! While mozzarella gives that classic melt and stretch, you can experiment with cheddar, provolone, or even a vegan cheese to suit your taste or dietary needs.
Is it okay to make this pizza vegan or gluten-free?
Yes! Use a gluten-free dough and a plant-based cheese substitute to make the Bunny Pizza Recipe vegan and gluten-free. Fresh veggie toppings remain the same, ensuring flavor and fun.
How can I make the bunny ears stay attached while baking?
Press the ear dough pieces gently into the main dough base to help them stick. You can also brush a little water where they join to act like glue, ensuring they stay put during baking.
Can I prepare the bunny face toppings ahead of time?
You can slice the olives, peppers, cucumber, and carrots a few hours in advance and keep them refrigerated in separate containers. This makes assembly quick and stress-free.
What if I want to make more than one Bunny Pizza Recipe?
Fantastic idea! Simply multiply the ingredients and prepare multiple dough rounds. This is great for gatherings or making meal prep fun and interactive with family or friends.
Final Thoughts
The Bunny Pizza Recipe is a delightful way to bring creativity and joy to your meals. Its playful presentation combined with comforting flavors makes it a standout dish that will charm guests of all ages. I warmly encourage you to try this recipe—you’ll find cooking it just as enjoyable as eating it!
Print
Bunny Pizza Recipe
- Prep Time: 15 minutes
- Cook Time: 15 minutes
- Total Time: 30 minutes
- Yield: 1 serving
- Category: Main Course
- Method: Baking
- Cuisine: Italian
Description
Create a fun and whimsical Bunny Pizza perfect for a playful meal. This adorable pizza features a bunny-shaped dough base topped with classic pizza sauce, melted mozzarella cheese, and decorated with colorful vegetables to form the bunny’s eyes, nose, mouth, whiskers, cheeks, and ears. Ready in just 30 minutes, it’s a delightful recipe suitable for kids and adults alike.
Ingredients
Pizza Base
- 1 pizza dough (store-bought or homemade)
- Olive oil for brushing
Toppings
- 1/2 cup pizza sauce
- 1 1/2 cups shredded mozzarella cheese
- 1/2 cup sliced black olives (for eyes and nose)
- 1 small red bell pepper (for the bunny’s mouth and cheeks)
- 1 small cucumber (for bunny’s whiskers and ears)
- 1 medium carrot (for the bunny’s nose)
- Fresh parsley or basil (for decoration)
Instructions
- Preheat the Oven: Preheat your oven to 475°F (245°C). Line a baking sheet with parchment paper or lightly grease it to prevent sticking.
- Prepare the Pizza Dough: On a floured surface, roll out your pizza dough into a large circle or oval shape. Transfer the dough gently onto the prepared baking sheet.
- Form the Bunny Shape: Shape the pizza dough into an oval to represent the bunny’s face. For the ears, form two elongated pieces of dough and attach them to the top of the oval body carefully.
- Spread Pizza Sauce: Evenly distribute the pizza sauce over the dough, leaving a small border around the edges for the crust.
- Add the Cheese: Generously sprinkle shredded mozzarella cheese over the sauce, covering the entire surface to ensure a cheesy base.
- Create the Bunny’s Eyes and Nose: Use sliced black olives to make two circles for the eyes and a small dot in the center for the nose.
- Form the Bunny’s Mouth: Cut a thin, slightly curved slice of red bell pepper and position it below the nose to mimic the bunny’s mouth.
- Add Cheeks: Place small pieces of red bell pepper on each side of the mouth to represent cheeks.
- Add Whiskers: Cut thin strips of cucumber and arrange them around the bunny’s face as whiskers.
- Create the Bunny’s Ears: Place cucumber slices shaped like long ears at the top of the dough. Add carrot slices inside for color and detail.
- Bake the Pizza: Place the pizza in the preheated oven and bake for 10-15 minutes, until the crust turns golden and the cheese is melted and bubbly.
- Finishing Touches: Remove the pizza from the oven and brush the crust with olive oil to add shine and flavor. Garnish with fresh parsley or basil for color and aroma.
- Serve: Slice up your charming Bunny Pizza and serve warm. Enjoy this delightful and creative meal with family and friends.
Notes
- Use a pizza stone if available to get a crispier crust.
- If you prefer a gluten-free option, substitute the pizza dough accordingly.
- Fresh vegetables add vibrant colors, but you can customize toppings based on preference.
- To make this recipe kid-friendly, involve children in decorating the bunny’s face.
- Store leftover pizza in the refrigerator and reheat in the oven for the best texture.


