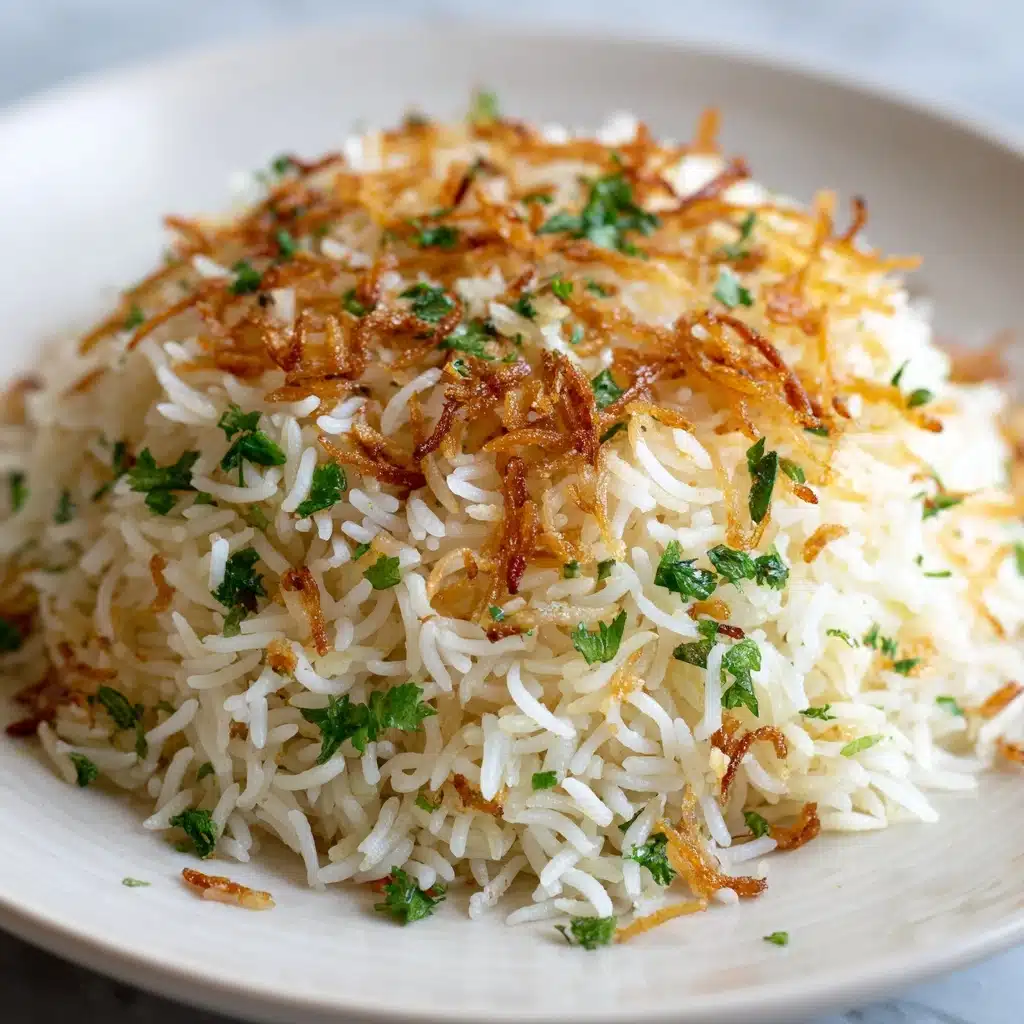
If you’re searching for the perfect balance of comforting flavors, tempting aroma, and simple elegance, Homemade Rice Pilaf – A Cozy, Flavorful Side Dish deserves a front-row spot on your table. This classic recipe brings together buttery rice, golden orzo, aromatic alliums, and a touch of fresh herbs for a fuss-free dish that pairs effortlessly with anything from roast chicken to Mediterranean-inspired fare. Whether you’re cooking for a weeknight family meal or a festive gathering, you’ll find yourself revisiting this flavorful pilaf again and again.
Ingredients You’ll Need
The beauty of this Homemade Rice Pilaf – A Cozy, Flavorful Side Dish is that every ingredient has a purpose, adding to the taste, texture, or color. You probably have most of these simple essentials on hand, but together they make magic!
- Unsalted butter: Adds richness and that classic pilaf flavor, allowing you to control the saltiness of the final dish.
- Olive oil: Blends seamlessly with butter, helping to coat each grain and prevent sticking, while imparting a subtle Mediterranean note.
- Small onion (finely diced): Brings natural sweetness and depth; dice it fine so it practically melts into the pilaf.
- Garlic (minced): Just two cloves create a gentle backdrop of aromatic flavor—don’t skip it!
- Long-grain white rice (rinsed): The base of our pilaf; rinsing removes excess starch for fluffy, separated grains.
- Orzo pasta: These tiny, rice-shaped pasta pieces add delightful texture and a pretty golden hue when toasted.
- Chicken broth or vegetable broth: Infuses the rice with savory flavor and keeps everything moist and tender.
- Salt: Essential for bringing out the full spectrum of other flavors—taste your broth before adding!
- Black pepper: Just enough to add gentle warmth and complexity.
- Dried thyme: Lends a subtle herbaceous note that brightens the whole dish.
- Bay leaf: Adds a hint of depth and earthiness—remember to remove before serving.
- Chopped fresh parsley: For a pop of color and freshness right before serving; it really makes the pilaf sing.
How to Make Homemade Rice Pilaf – A Cozy, Flavorful Side Dish
Step 1: Sauté the Aromatics
Start by melting butter and olive oil together in a large skillet with a fitted lid over medium heat. This duo forms a flavorful, silky foundation. Toss in your finely diced onion, and let it gently soften for about 3 to 4 minutes. You’ll know it’s perfect when it turns translucent and smells sweet and inviting. Next, add the minced garlic and cook for just 30 seconds, stirring so it doesn’t burn—this punch of fresher, sharper aroma is what sets Homemade Rice Pilaf – A Cozy, Flavorful Side Dish apart from plain rice.
Step 2: Toast the Grains
Add the rinsed rice and orzo pasta directly to your pan, stirring well to coat every piece in your butter and oil mixture. Keep things moving for 3 to 4 minutes—your orzo will start to pick up a golden color while both rice and pasta gain a slightly nutty fragrance. This step is key to developing that classic pilaf flavor and ensuring your grains stay fluffy, never mushy.
Step 3: Simmer with Broth and Seasonings
Pour in your chicken or vegetable broth, then add the salt, black pepper, dried thyme, and the bay leaf. Give everything a gentle stir to combine. Watch as the broth bubbles up—this is where the magic happens! Bring to a boil, then immediately lower the heat and cover tightly. Let your rice pilaf simmer away on low for 18 to 20 minutes; try not to lift the lid, as all that fragrant steam is working to make the grains perfectly tender.
Step 4: Rest and Fluff
Once the pilaf is done (the liquid is fully absorbed and the grains are tender), remove the pan from the heat but keep the lid on for another five minutes. This gentle resting period lets the rice finish steaming and soak up any last traces of flavor. After five minutes, remove the bay leaf, grab a fork, and fluff the pilaf to release extra steam—this keeps everything light and separate.
Step 5: Finish with Fresh Herbs
Just before serving, shower your handcrafted creation with freshly chopped parsley. This one last sprinkle brings a burst of color and brightness. Serve straight from the pan and bask in the lovely aroma that fills your kitchen. You’ve just made a memorable Homemade Rice Pilaf – A Cozy, Flavorful Side Dish!
How to Serve Homemade Rice Pilaf – A Cozy, Flavorful Side Dish

Garnishes
Plenty of fresh parsley is a classic choice, but you can make this dish your own by adding a sprinkle of lemon zest, a handful of slivered almonds, or even a few pomegranate seeds for a touch of sweetness and color. These little extras will highlight the cozy, welcoming vibe of Homemade Rice Pilaf – A Cozy, Flavorful Side Dish.
Side Dishes
This pilaf is the ideal companion for roasted chicken, lamb, grilled fish, or hearty vegetarian main dishes. It balances out bold flavors and offers a comforting backdrop for saucy entrees. Try serving it alongside lemony Greek chicken, spiced roasted vegetables, or even a tangy salad for a complete meal.
Creative Ways to Present
For special occasions, transfer your pilaf to a beautiful serving dish and finish with extra herbs or toasted nuts. You can even press the warm pilaf into a measuring cup to make neat mounds for individual plating—so elegant and fun! Layer it as a bed beneath braised meats or roasted vegetables for a restaurant-worthy presentation. However you serve it, Homemade Rice Pilaf – A Cozy, Flavorful Side Dish looks as good as it tastes.
Make Ahead and Storage
Storing Leftovers
If you happen to have leftovers (lucky you!), cool the pilaf to room temperature and store it in an airtight container in the fridge. It will keep beautifully for up to 4 days, making it perfect for quick lunches or easy weeknight dinners.
Freezing
Homemade Rice Pilaf – A Cozy, Flavorful Side Dish actually freezes remarkably well! Transfer cooled pilaf to a freezer-safe zip-top bag or container. Lay it flat for easier thawing, and freeze for up to three months. When you want to reheat, simply thaw overnight in the fridge or gently break off a portion if you’re in a rush.
Reheating
To bring your pilaf back to its fragrant best, sprinkle a tiny bit of water over the rice before reheating. Warm on the stovetop over low heat or cover and microwave in short bursts, fluffing after each. The added moisture keeps the grains tender and prevents drying out, so every bowl tastes freshly made.
FAQs
Can I use brown rice instead of white?
Absolutely, but keep in mind that brown rice has a longer cooking time and will need more liquid—start with an additional 1/2 cup of broth and simmer until the rice is tender.
What can I use instead of orzo?
If you don’t have orzo, broken spaghetti is a great substitute. Just break it into short pieces and toast it along with the rice, or try other small pasta shapes like ditalini or couscous.
Can I make Homemade Rice Pilaf – A Cozy, Flavorful Side Dish vegan?
Yes—simply use your favorite plant-based butter and opt for vegetable broth instead of chicken. It’s every bit as fragrant and cozy!
Is this pilaf gluten-free?
Traditional orzo pasta contains wheat, so for a gluten-free version, swap orzo for gluten-free pasta or leave it out and use only rice for a still-delicious result.
Can I add vegetables or protein?
Definitely! Stir in frozen peas, diced carrots, or even leftover shredded chicken during the last few minutes of cooking for extra color, nourishment, and texture in your Homemade Rice Pilaf – A Cozy, Flavorful Side Dish.
Final Thoughts
If you’re yearning for a side dish that’s warm, inviting, and bursting with gentle, savory flavors, Homemade Rice Pilaf – A Cozy, Flavorful Side Dish is sure to win a spot in your regular meal rotation. Give it a try and share the comfort—your kitchen will feel like the coziest place in the world!
Print
Homemade Rice Pilaf – A Cozy, Flavorful Side Dish Recipe
- Prep Time: 10 minutes
- Cook Time: 25 minutes
- Total Time: 35 minutes
- Yield: 4 servings
- Category: Side Dish
- Method: Stovetop
- Cuisine: American, Mediterranean
- Diet: Non-Vegetarian
Description
Homemade Rice Pilaf is a delightful and comforting side dish that pairs perfectly with a variety of main courses. This flavorful recipe combines white rice and orzo pasta with fragrant herbs and aromatics for a dish that is both simple to make and incredibly satisfying.
Ingredients
Main Ingredients:
- 2 tablespoons unsalted butter
- 1 tablespoon olive oil
- 1 small onion, finely diced
- 2 cloves garlic, minced
- 1 cup long-grain white rice, rinsed
- 1/2 cup orzo pasta
- 2 1/4 cups chicken broth or vegetable broth
Seasonings:
- 1/2 teaspoon salt
- 1/4 teaspoon black pepper
- 1/2 teaspoon dried thyme
- 1 bay leaf
Garnish:
- 2 tablespoons chopped fresh parsley
Instructions
- Saute Aromatics: In a large skillet with a lid, melt the butter with olive oil over medium heat. Add the onion and cook until softened. Stir in garlic.
- Add Rice and Orzo: Add rice and orzo, toasting until lightly golden.
- Cook with Broth: Pour in broth, add seasonings, and simmer covered until rice is tender.
- Finish and Serve: Let sit, fluff with a fork, and garnish with parsley before serving.
Notes
- For a nuttier flavor, toast the orzo before adding the rice.
- Feel free to add vegetables like peas or carrots for extra color and taste.


